Tutorial Intro to Redux in React
Posted in Tutorials


This tutorial introduces you to using Redux in React by creating the usual “To do” app.
Start with …
create-react-app redux-todo
cd redux-todo
npm run eject
npm install
npm start
where “redux-todo” is the name of our app. See how to we create a React starter app with create-react-app.
- To work with Redux you are going to have to install …
npm install redux react-redux
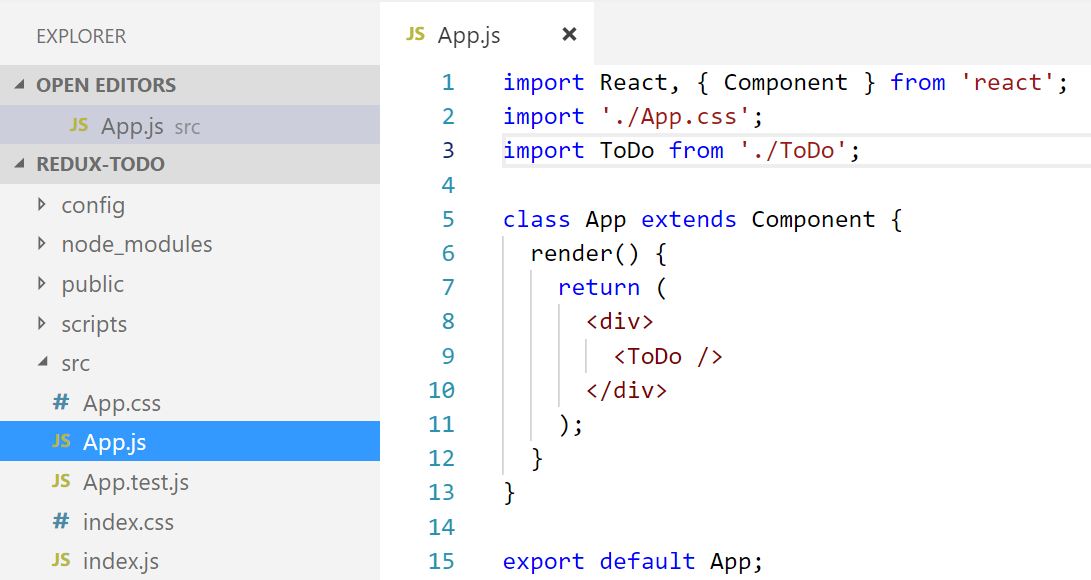
2. Once you got your starter app working, go into “src/App.js” delete the un-necessary starter app code and add in a <ToDo /> component…
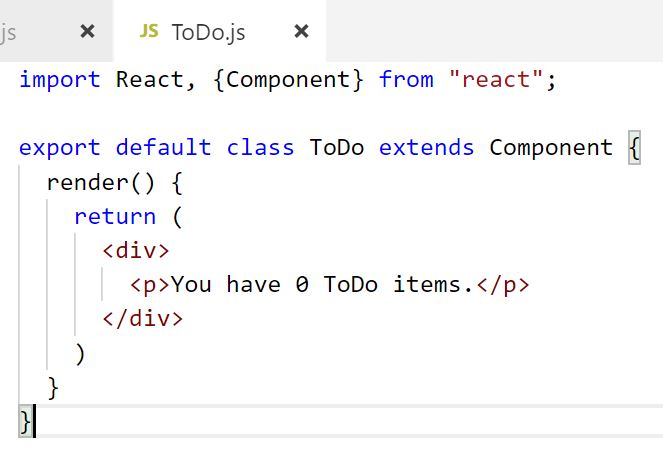
2. Create the new ToDo component in file “src/ToDo.js” with contents like this…
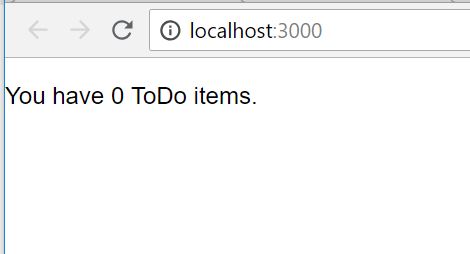
3. Your app should now render like this…
4. I like to start by adding the <Provider> component around my <App> component in index.js…
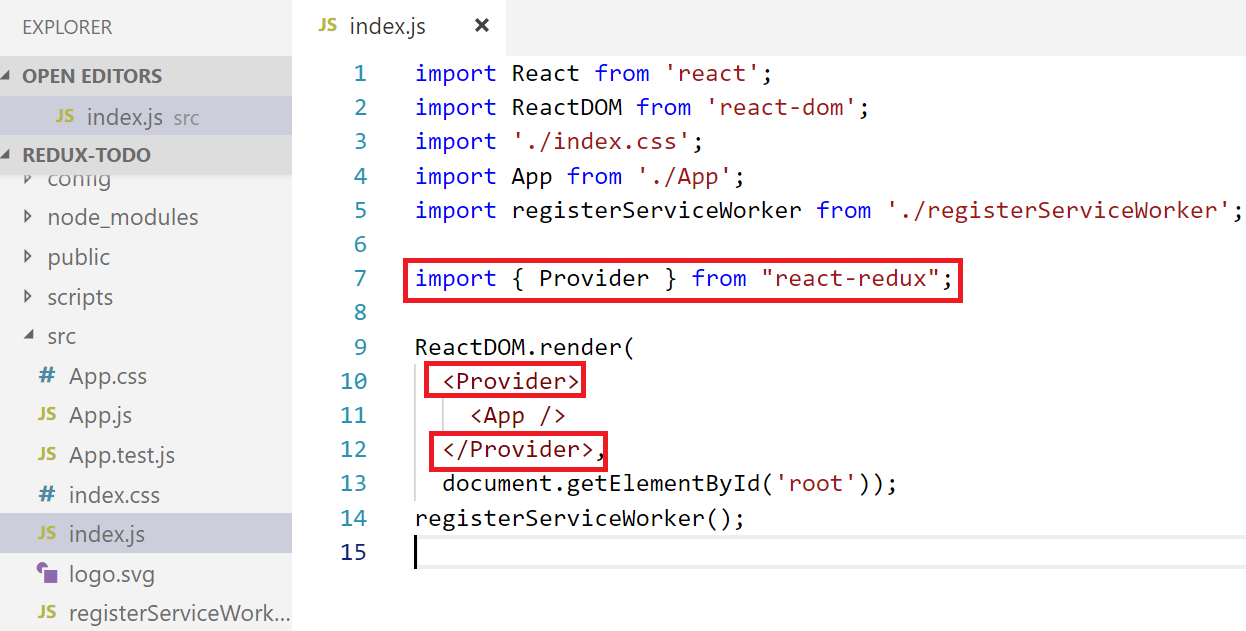
This <Provider> comes from “react-redux” and helps connect Redux with React.
5. The <Provider> takes a prop call “store” which we will pass in our Redux store which we arbitrarily name as “appStore”.
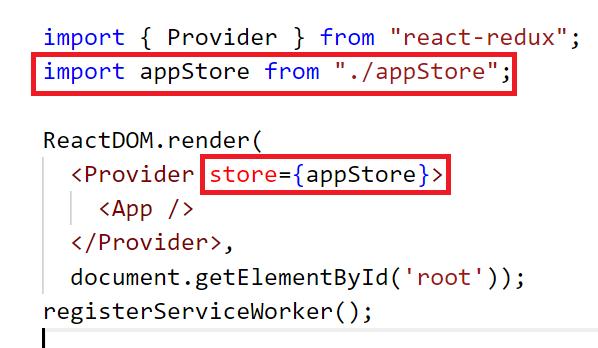
6. We define our appStore in file “appStore.js” with the following content for now…
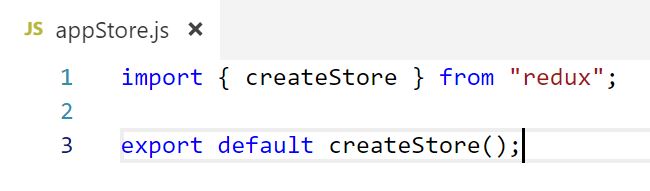
The createStore function from “redux” will create our store. We call this function and export the store that is returned.
7. If you run app now, you get error message …
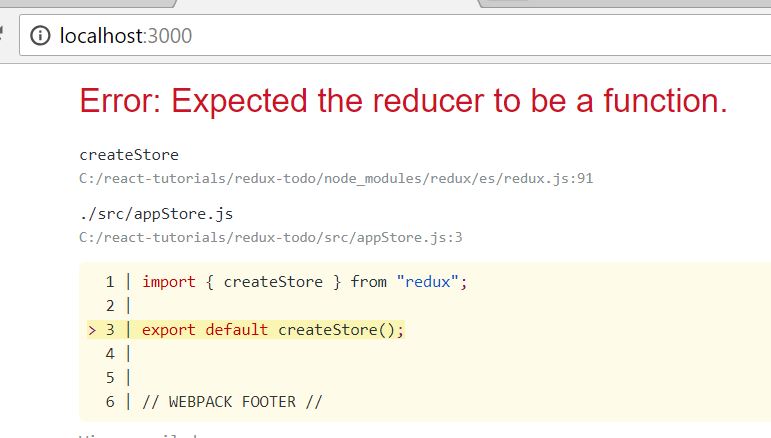
8. This reminds us that we need to pass in a “reducer” into our createStore function…
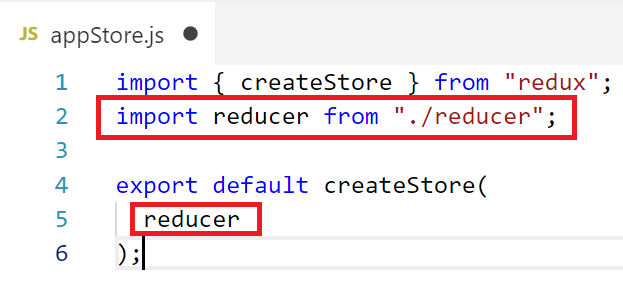
9. The reducer is something that we have to define ourselves in a new file “src/reducer.js” with contents …
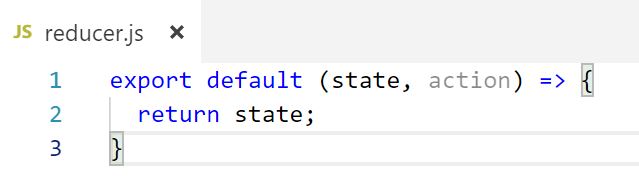
This is the simplest reducer that we can have. Now our app should work without error again. A reducer takes in the existing state and an “action” and it returns a new state. In our simple case, we are returning the same state as before.
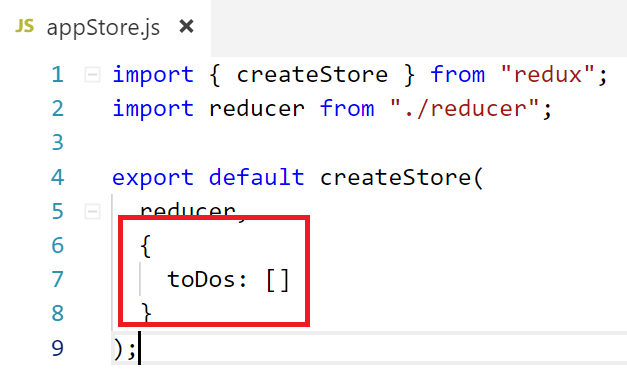
10. Where do we define the states of our store? It can be defined in two places.
The first place is to put it in the second argument to createStore which is the “preloaded state”
So we add an toDos array to our state…
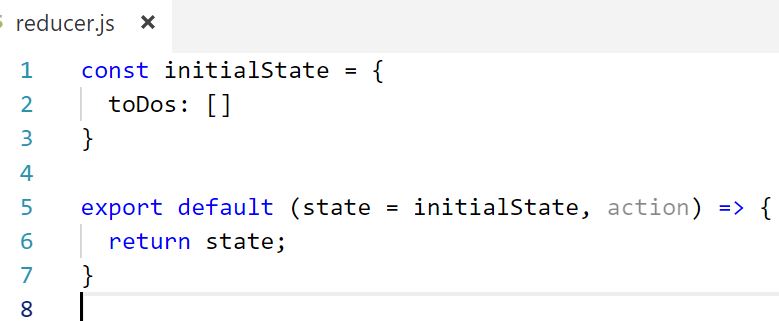
If you leave out this optional second argument, then the first time that the reducer is called, the state param will be undefined. With ES6 syntax, when that is the case you can specify the default value. And that is the second place where you can define your initial state like this…
You need not define it in both places. As mentioned in the Redux docs …
“Reducers whose initial state is populated using preloadedState will still need to provide a default value to handle when passed a state of undefined. All reducers are passed undefined on initialization, so they should be written such that when given undefined, some value should be returned. This can be any non-undefined value; there’s no need to duplicate the section of preloadedState here as the default.”
We shall choose to define in preloaded state and supply an empty object as default in the reducer…
![]()
11. An “action” in Redux is an Javascript object. It must have a property called “type”. The role of a reducer is to change state based on an action’s “type”. So let’s put in some logic into the reducer…

We define our action types. Here we define an action type of “ADD_TODO” as an action to add an item to our ToDo list. When an action object of that type is passed into the reducer, we return a new state object. This new state object should have the same shape as our original state. Therefore it has an toDos array. And it has the same things in the array as before. Hence the
...state.toDos
We are just tacking onto the end of the array another item which is our new ToDo item to be added.
The action object can carry a data payload. When action object is passed to the reducer, we will also have the action object pass in the value of this new ToDo item. We have full control of how this action object is defined. So we shall have this new ToDo item be passed in as the “item” property of the action object.
There are a few ground rules when writing reducers. You should never change the passed in state. In other words, you can not mutate state. And you should always return some new state. The reducer needs to be a pure function. Therefore, we should never see such code like …
state.counter = 42, nor state.toDos.push(newItem)
Also note there should always be a default clause in your switch statement to return the original state in the event that an action was passed in that does not match any of the switch cases. Even if you know you won’t pass in such an invalid action, React may in some circumstance call the reducer with its own action that does not match any of your cases.
12. Now how is the action object come to be? In other words, how is the action object dispatched? The Redux store has a method called “dispatch”. Components connected to the store can dispatch action objects.
13. How can we connect components to the store? I’m glad you asked. We use the connect function of “react-redux”. We re-write our ToDo component to connect it to the store like this…
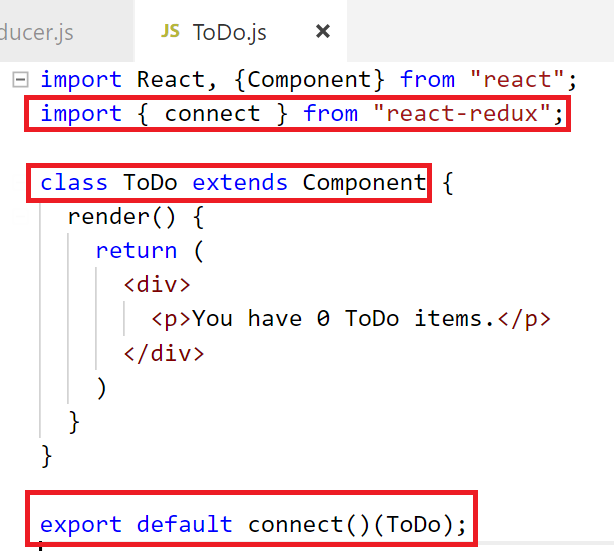
connect is an higher order function which means that this function returns another function. We invoke connect with the first set of parenthesis. This returns a function into which we pass our ToDo class. That function then executes and that is what is exported from this module. In other words, ToDo.js is no longer exporting our ToDo class. It is exporting a “connected ToDo class” which has extra Redux related stuff added as props. Here is a joke to help you remember the connect function.
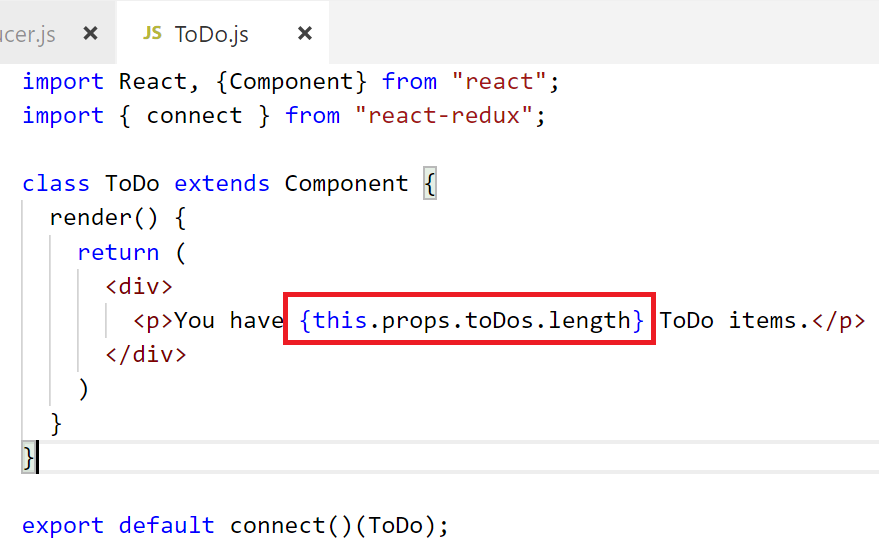
In particular, the “connected ToDo class” will be able to have props matching that of our appStore state. For example, it will be able to access the toDos array like this…
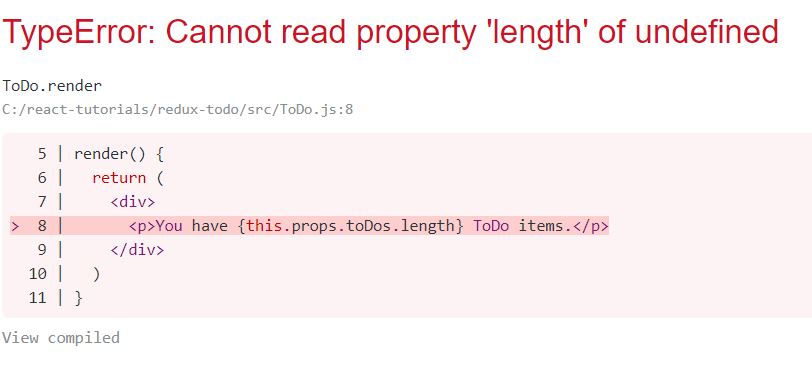
14. Oops. The app is running into error now saying that “this.props.toDos” is undefined…
15. What I meant to say was that the component can access the store props as long as we pass in a correct function as the first param to the connect function. This parameter is typically called “mapStateToProps” and is used like this …
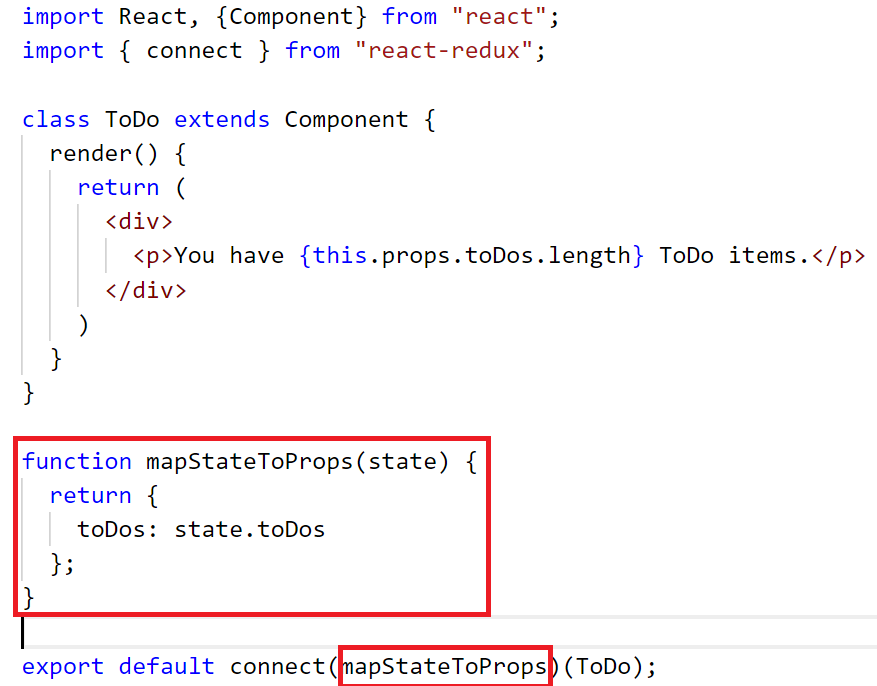
mapStateToProps is a function that returns an object whose keys are the additional props that you want your component to have. The value is the state properties that map to that prop.
16. Now your app should work — still showing 0 ToDo items. But at least the zero is the real count instead of an hard-coded zero.
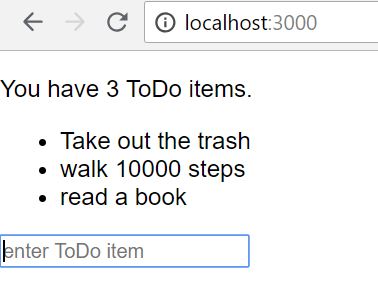
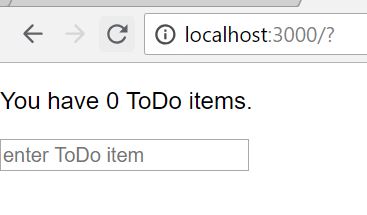
17. Time to add a form to our ToDo component so that we can submit new ToDo items.
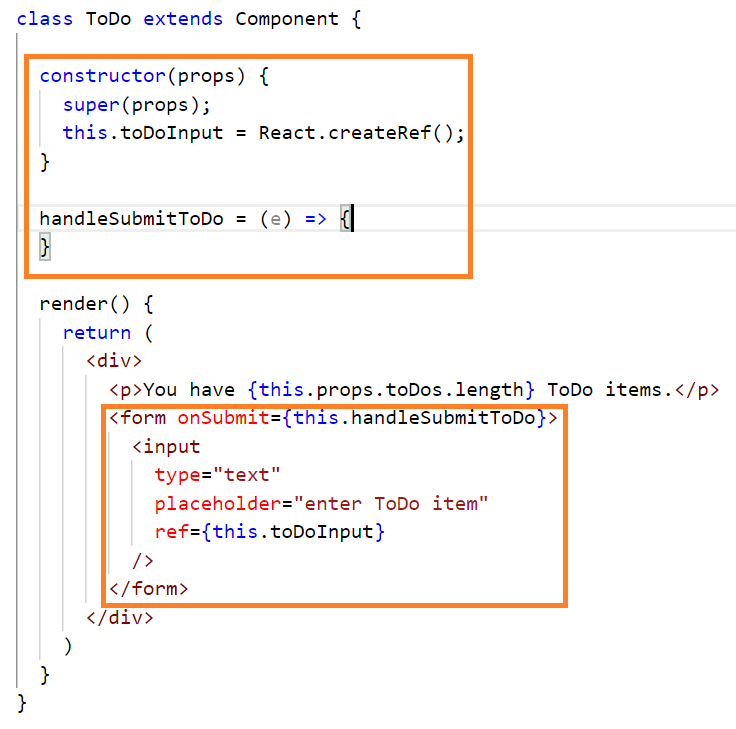
In the input box, we have a ref so that the React component can refer to the value of the input box later. This ref is created in the constructor with React.createRef().
When the form is submitted (when user press enters to the input box), we call “handleSubmitToDo” which doesn’t do anything yet. In fact, when enter is pressed, the entire page is reloaded, which is the default behavior of HTML when a form is submitted. We don’t want this reload, so we write “e.prevenetDefault()” like this …

We also call reset() to reset the clear out the input box once the value is submitted.
The “this.props.dispatch” is what the component calls in order to dispatch an action to the reducer. Here the action dispatched is of type “ADD_TODO” and we are passing in an “item” of whatever was typed into the input box (which is “this.toDoInput.current.value”) — this is how ref is used.
Try the app now and you see that the ToDo count is incremented for each item you submit.
18. We need to see this list of item in an unordered list of <li> …
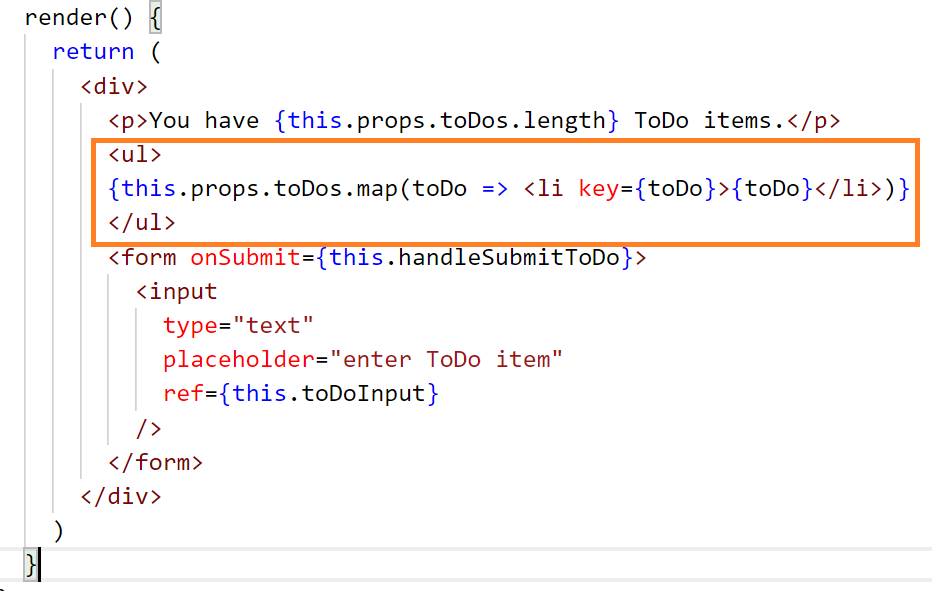
The above code have the flaw that if user submits two ToDo items that are identical, then the keys for the <li> will not be unique and React does not like that by throwing you a warning in the browser console. We fix by doing …

And that is it for the ToDo app. It works. Please compare the Redux version with the Mobx version here to see the difference between Redux and Mobx.
This tutorial was intentionally kept simple. In next series of tutorials, we will continue from here with a few more advance topics. Next, we learn to use string constants in a separate file for action types.
Related Posts
Tags
Share This

