AngularJS Posting Login Form
Posted in Tutorials


In this example, we are going to create a Bootstrap login form and have AngularJS perform an POST on this form to a backend PHP page to see if the username and password is correct.
1. We first create a check-login.php file that performs mock validation of username and password …
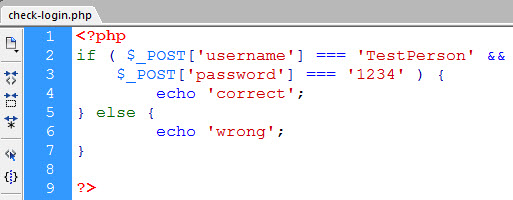
PHP check login page
Obviously, this is not production code. It is just a mock to simulate the checking. It will echo out “correct” to the page if the username is “TestPerson” and password is “1234”. Otherwise, it will echo out “wrong”.
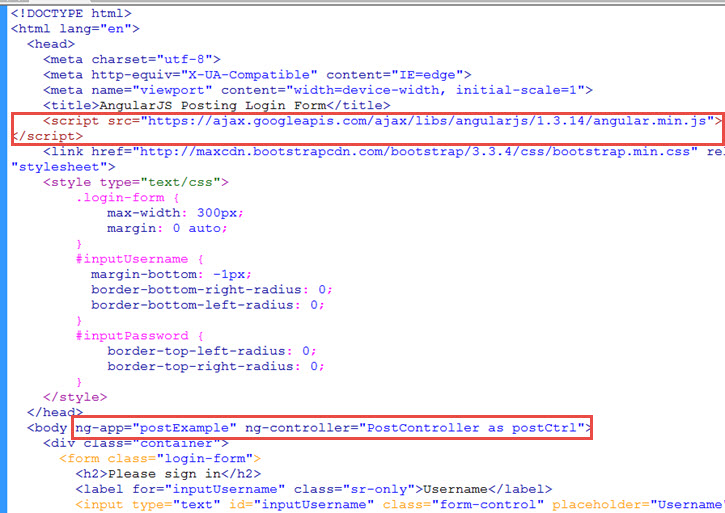
2. Next, we create a index.html file with basic login page based on Bootstrap example here…
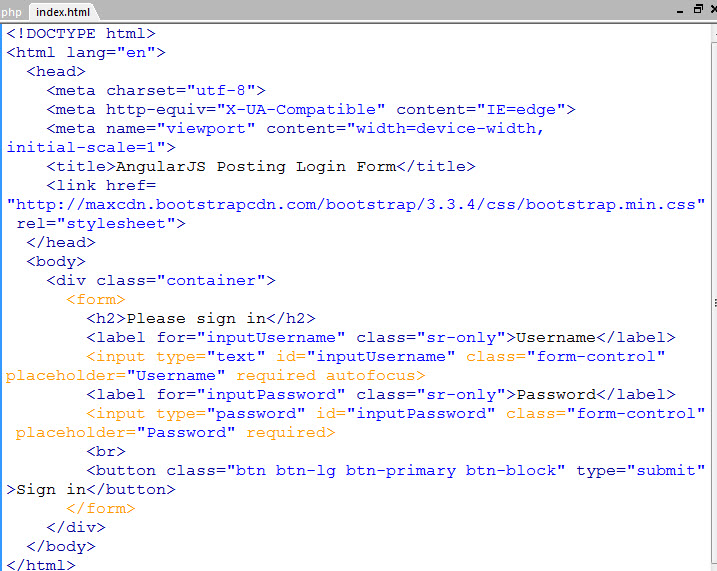
basic bootstrap form setup
This is just a basic HTML5 page with reference to Bootstrap 3.3.4 on from Bootstrap CDN. All the classes you see here (container, form-control, btn, btn-lg, btn-primary, btn-block, sr-only) are Bootstrap classes. For example, the “sr-only” class is for screen readers and the element containing that class will not be visible.
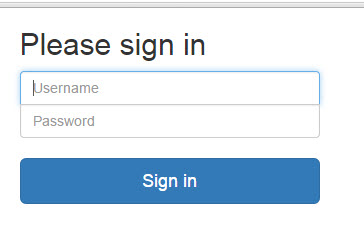
When rendered in the browser, it looks like this …
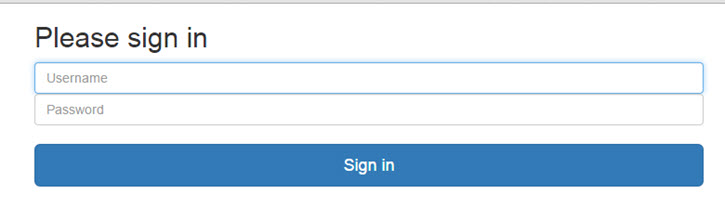
Initial Bootstrap Form
3. The form is bit too wide on wide screens and we want to make the two input fields look more integrated, so we add additional styling by adding class “login-form” to the form element with these styles …
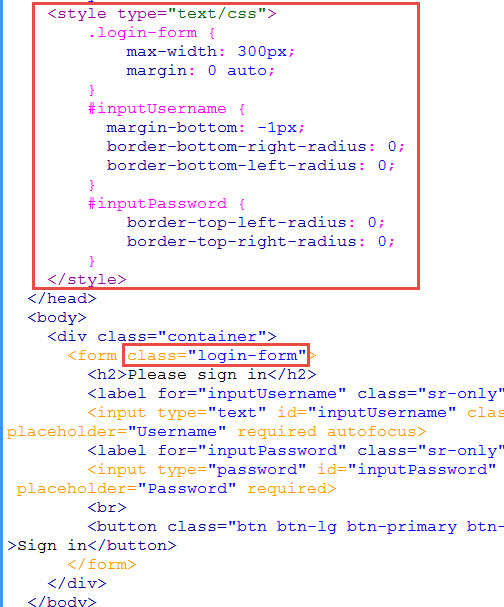
Additional CSS styling
That makes the form no wider than 300px and centered horizontally across the page. We also got rid of the rounded corners on the adjacent sides of the two input box. The margin-bottom of -1px is just to overlap the two abutting borders. So now it looks like this …
Bootstrap form ready
4. Now we start adding AngularJS by referencing the AngularJS 1.3.14 library from the Google CDN…
Referencing AngularJS
We attached ng-app and ng-controller to the body tag. We gave our app the name “postExample” and our controller the name “PostController” which we define in a script at the bottom of the file shown here …
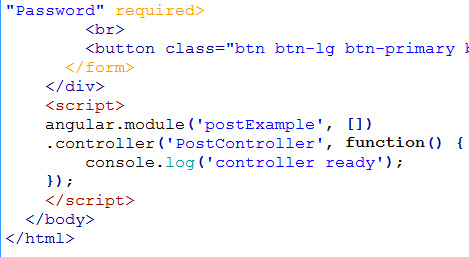
script for angularjs
We’ve added an console.log in the controller function so that if we now render the page in our browser with the console window opened, we see…

controller ready
If we see “controller ready”, then we know things are all right so far. For details on the basics of the AngularJS we have done here, see angularjs.learnwebtutorials.com.
5. Now that we know controller is working, we take out the debugging console.log call. We also know that we will be using the AngularJS $http service to post to our check-login.php, so we inject that service into the controller using array syntax …
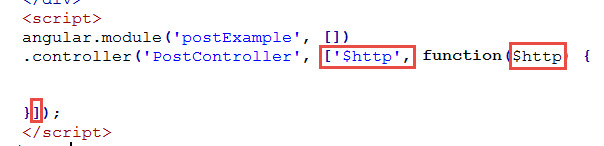
inject $http service
6. In our controller, we define postForm function that uses the $http service like this …
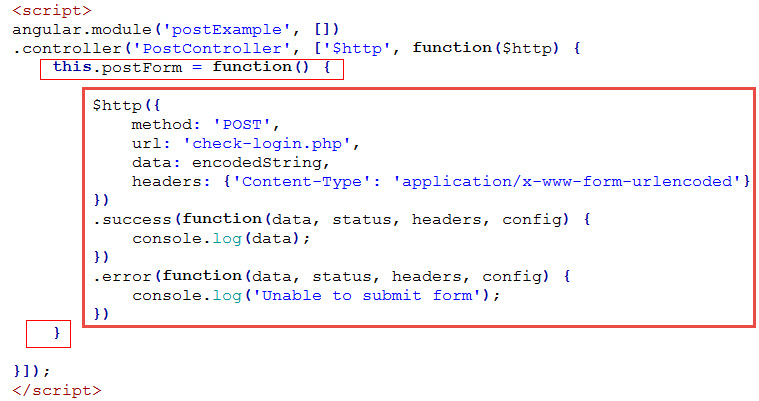
postForm method
We pass into the $http call an object with the properties sho. The method is ‘POST’. The url is the backend PHP file that we are posting to. The data is the data that we are posting, which is contained in the variable “encodedString” which we will define shortly. And the headers as shown. The $http call returns a promise that will result in the success function or the error function being called.
7. We want the postForm function to be called when the form is submitted. We do this by AngularJS’s ng-submit directive on the form element…
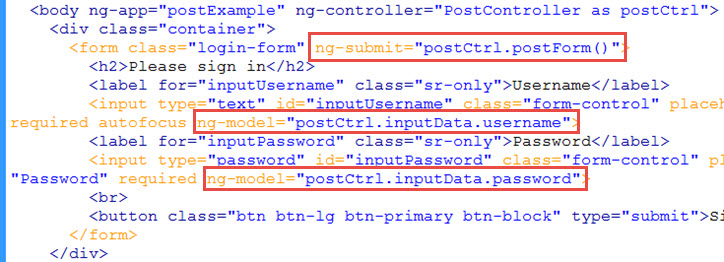
using ng-submit
8. We also need the AngularJS directives ng-model on both input boxes (shown above) in order to pass the entered data to the controller. The controller gets a hold of these data and encode it with the Javascript encodeURIComponent method like this …
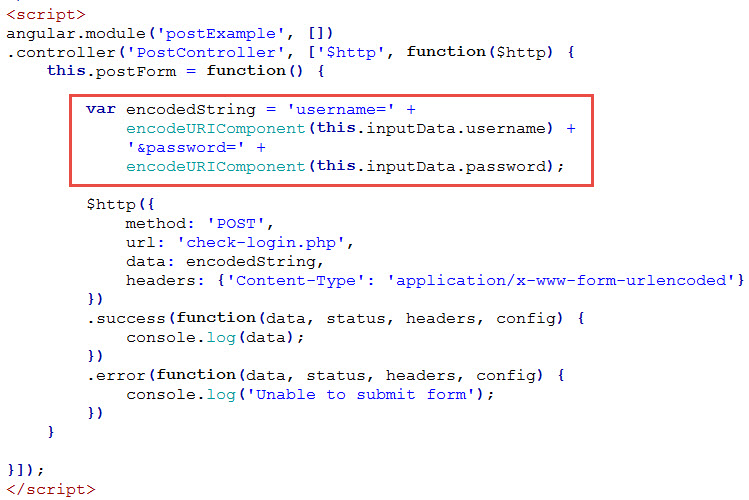
encode data inputs
9. Run the index.html and check-login.php in the same directory on the server. Enter a username and password (regardless of correct or incorrect), you should get a console.log of the data from the success branch of the returned promise.
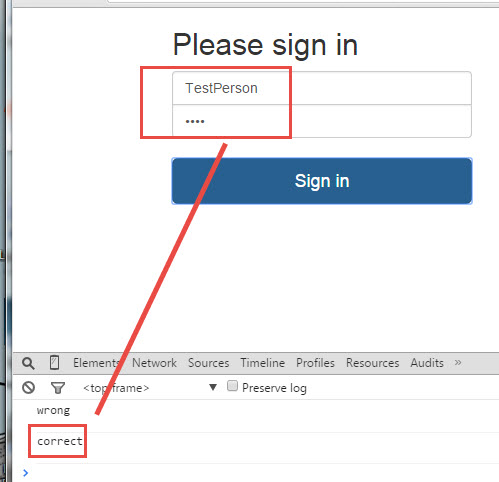
correct login
That data which is output by check-login.php will either be “correct” or “wrong” — the former if username=”TestPerson” and password=”1234″ is entered, the latter otherwise.
The error branch should occur in rare instances such as if the check-login.php page is missing — in which case, the console will log out “Unable to submit form”.
10. If the “data” gotten back from the PHP is “correct”, we redirect to a success page which we call success.html …
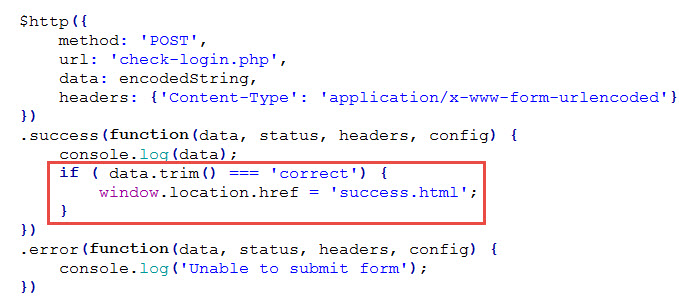
redirect to success page
We need to trim() the data because PHP could have outputted some extraneous whitespaces.
11. The success.html page could be simply coded like this …
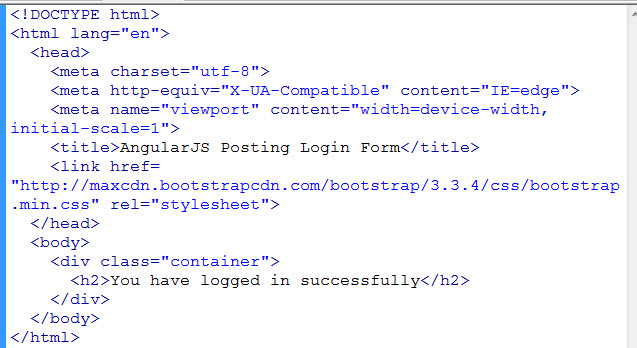
the success page
12. If the username and password is incorrect, we want the controller to pass back an error message to the Bootstrap view. The AngularJS $scope object is what connects the view with the controller. That means that we have to inject the $scope object in our controller. In the “else” clause, let’s have the controller set the errorMsg variable (which we arbitrarily defined) on the scope object to a string containing the error message…
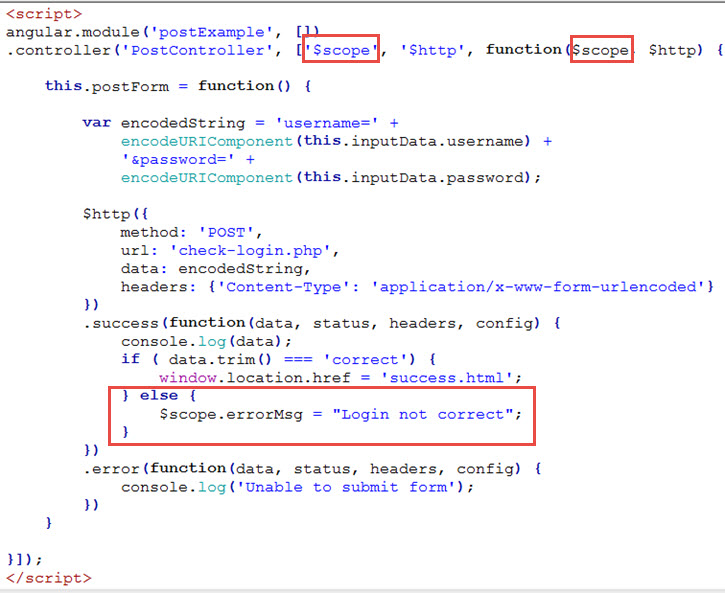
save error message on $scope
13. Because “errorMsg” was placed on $scope, the view automatically have access to it. Using Bootstraps Alert classes, we output this error message right above the submit button…
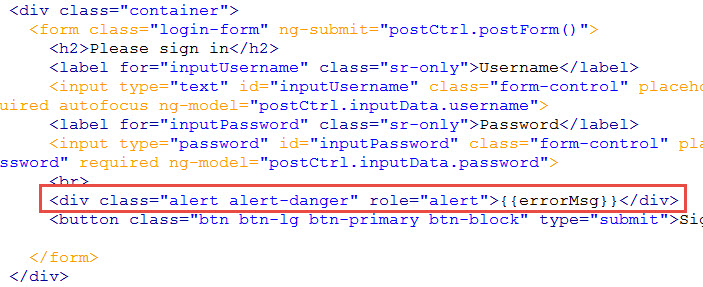
Bootstrap alert classes
“alert” is a Bootstrap class to render an alert box. The Bootstrap class “alert-danger” makes the alert red. The double curly braces is how we output AngularJS $scope variable to the view.
14. Type in a wrong login and see error message …
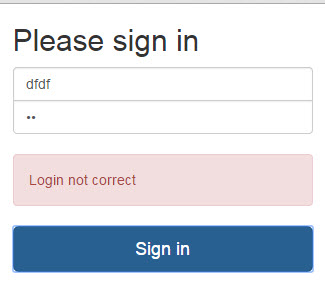
wrong login
Note that this index.html login page never refreshed (even when showing the error message). This is what is meant by an AJAX post call. AngularJS on this page called the check-login.php page asynchronously. When check-login.php returns “wrong”, AngularJS dynamically wrote out the error message without the index.html having to go back to the server a second time.
15. The problem now is that the initial login page has a blank alert …
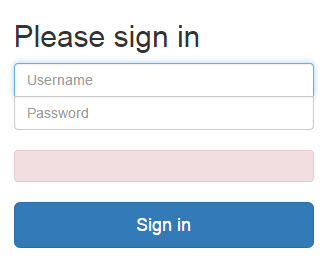
blank alert
16. We want this alert div to show only if there is an “errorMsg”. AngularJS has ng-show that will tell an DOM element to show only if the ng-show value is truthy. We use it like this …
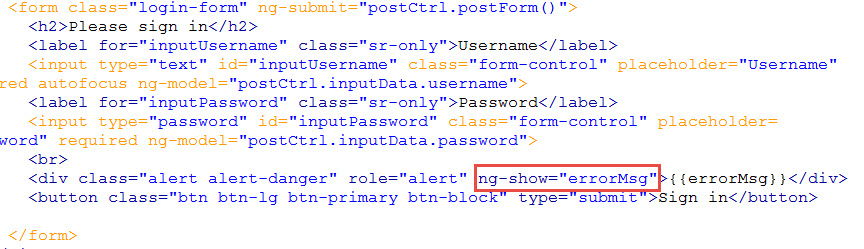
using ng-show
17. Set the errorMsg on the error branch …
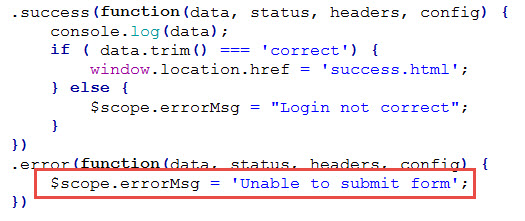
set error message
And we are done.
The completed demo is here and the download of the zip file.
Related Posts
Tags
Share This

