How to Set Up Node Environment in Cloud9
Posted in Tutorials


After installing Cloud9 and installing BitBucket, we are going to set up a basic Node.js development environment on Cloud9 using BitBucket as a Git source control.
1. In BitBucket, create an empty and private repository, giving your repository a name (we use HelloNode) …
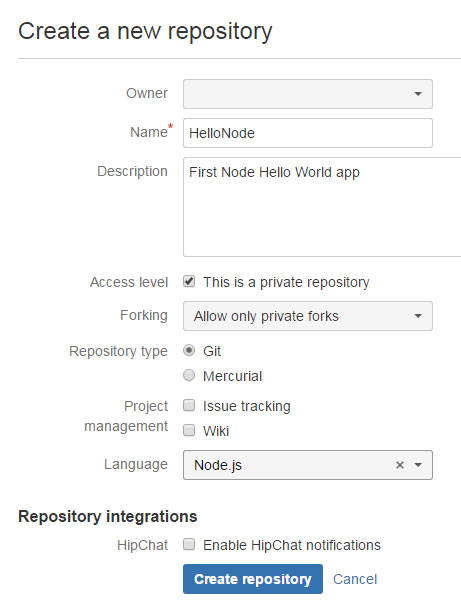
new repository
2. And here is the Git URL…

git url
3. Now in Cloud9, make sure BitBucket is activated as an Add-On Service and you will see the Git repository on the left menu…
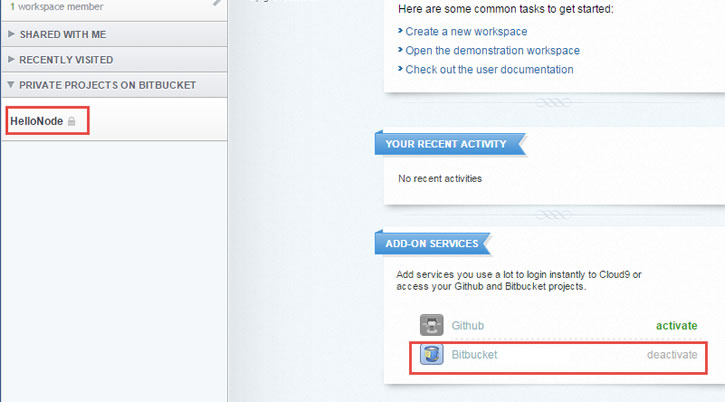
Repository in Cloud9
4. Click on the menu and click button “Clone to Edit” clone the BitBucket repo in Cloud9 development environment…
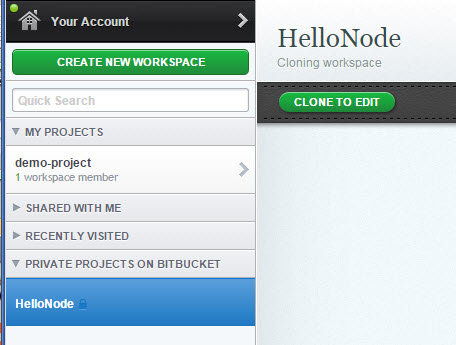
clone to edit
5. In the next page, select private workspace, Node.js, and click “Create”…
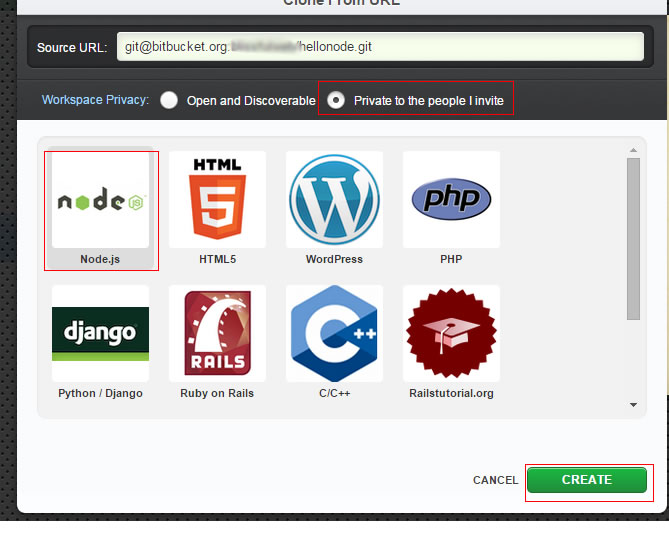
set private workspace
6. In next page, click “Start Editing” and you get a workspace which appears to have no files…

cloud9 workspace
7. Until, you turn on “Show Hidden Files” …
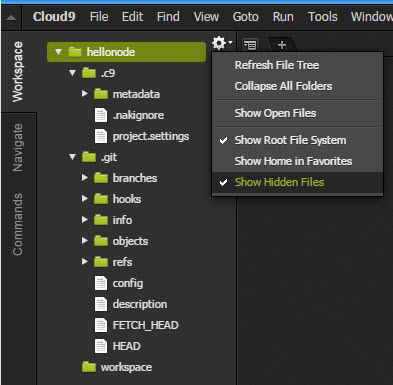
show hidden files
The config file for example will contain the path to your Git Repository.
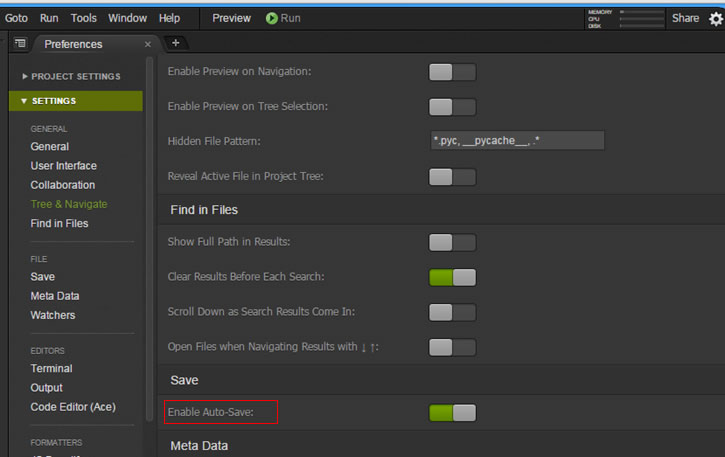
8. You can enable auto-save in the Preferences by clicking the “gear” icon in upper right…
enable autosave
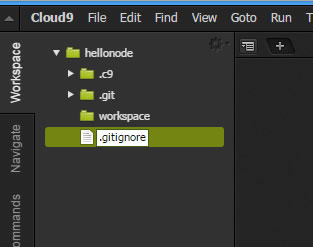
9. Right-click on the file pane and create the .gitignore file at the project root…
create gitignore file
10. Double-click on the file and start adding directories that you don’t want to put up in the git repository…
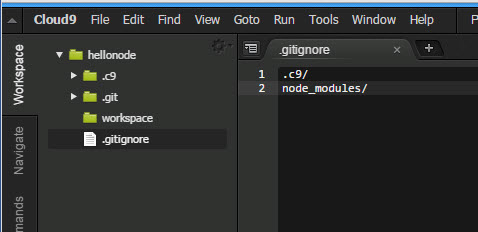
add to file
Remember to Ctrl-S to save your files if you don’t have auto-save turned on.
11. Let’s create app.js file and copy the “Hello World” web server code from nodejs.org homepage…
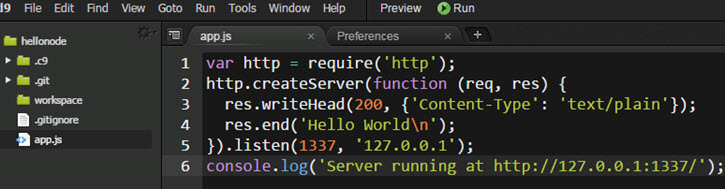
example web server
12. Click the “Run” button at the top nav bar to run this script. See that Cloud9 opens a new “Runner Config” with the Runner being Node.js and the command being “app.js”…
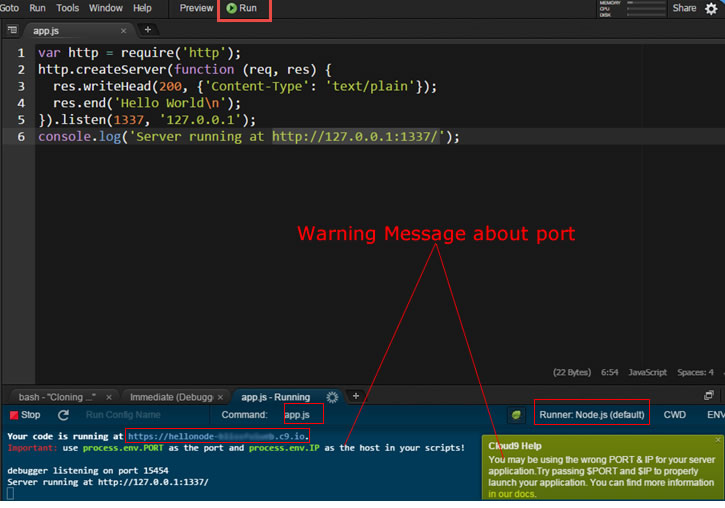
running node
13. The runner window gives you an URL as to where your web app is running. However, the web app is not running correctly because the warning messages are saying that we should be using process.env.PORT and process.env.IP as the port and host in the scripts.
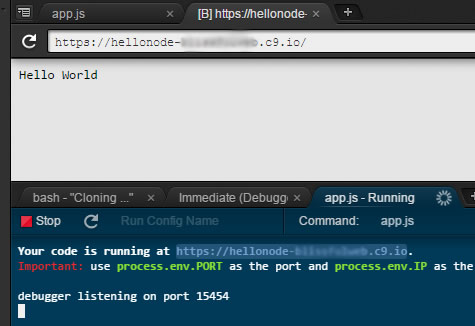
14. Click the Stop button to stop the script. Let’s change that and remove the console.log message …

change port and host
15. Click Run again and click link of your web URL and it should show your “Hello World” web page…
running now
16. While your script is running, you can type in the “Immediate (Debugging)” window the following …
process.env.PORT
to see the value of that variable.
17. Remember to stop your script when you are done playing. And we delete our app.js by right-clicking on the file and selecting delete.
Installing Express
18. Now we will use npm (“Node Package Manager”) to install “express-generator” so that we can generate the Express skeleton of our app. You can learn more about express-generator on npmjs.com which even gives you the command on how to install it. We type this command into the bash shell (note that we are in the “workspace” directory when we run it)….

install express-generator
We use the -g option to install it globally rather than with our app, because express-generator is a command line tool and we are not going to need to deploy it with our app.
19. Now run …
express .
to install express on the current directory. It asks if it is okay if the directory is not empty, we say yes…

express skeleton created
20. At the bottom of the terminal, it tells us that we can install dependencies with …
npm install
Run that now. This will install the dependencies listed in package.json into the “nodes_modules” folder.
21. If we type …
npm start
it would run “node ./bin/www” as listed in the “start” property of package.json …
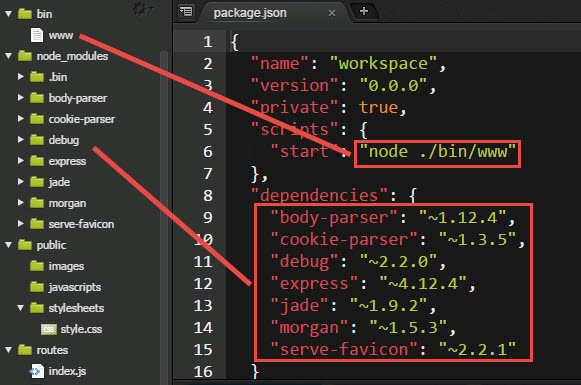
package.json
22. Looking at the www file …
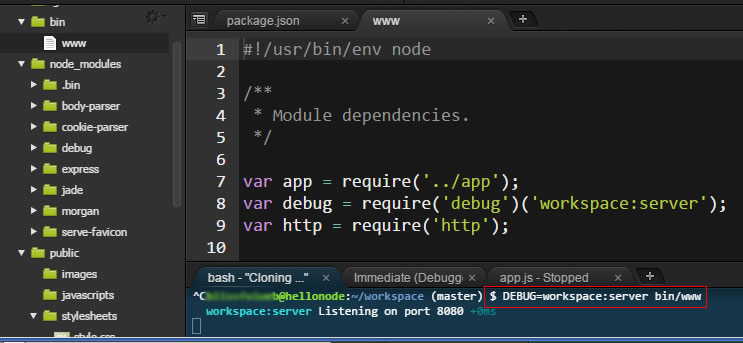
www file
we see that it wants a DEBUG environment variable of “workspace:server”. So we type …
DEBUG=workspace:server bin/www
at the prompt and our app runs and listens on port 8080. You can kill the script with Ctrl-C
23. Instead of having to type this every time, we create a “runner configuration” with the DEBUG environment variable in place…

setting up a running
24. Run and view your app in the browser with the URL provided in the terminal window…
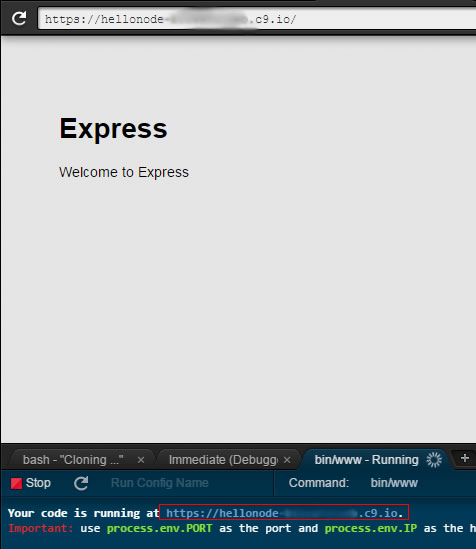
welcome to express
You should see “Welcome to Express” to indicate that things are working. You can even view this URL in another browser. If this is the first time, Cloud9 will prompt you to login if this is a private workspace.
Related Posts
Tags
Share This

