Installing Ruby on Rails in Windows
After installing ruby on Windows by following these steps, we use gem to install Ruby on Rails (also known as RoR). This is because Rails is a ruby gem. You can see this gem by searching “rails” in RubyGems.org
1. Typing …
gem install rails
at the command prompt will attemp to install rails.

attemp at installing rails
2. As you can see, the attempt was not successful. It gave the error…
ERROR: Error installing rails:
The ‘json’ navite gem requires installed build tools”
Installing devkit
3. We go to http://rubyinstaller.org/downloads
And download the devkit installer that is appropriate for our version of ruby. We have ruby 1.93 as determined by “ruby -v”.
4. The devkit comes as an self-extracting exe file. Run the exe and extract to c:\devkit.
5. Navigate to c:\devkit and run “ruby dk.rb init” as described here.
This creates the config.yml file, which you can edit to include rubies that you want to be enhanced with DevKit.

devkit config file
6. And then type “ruby dk.rb install”
7. Now re-run
gem install rails
This has installed rails and its dependencies as well as “ri docs”
8. Type “ri” to start. Then type a method name to look up (such as “to_a”). Ctrl-C to exit.
Building first Rails App
9. Create an empty folder c:\tutorials\learnrails.
10. CD to that directory and type …
rails new greeting
11. This created a new app in a newly created folder called “greeting”.
Rails App Structure

rails app structure
12. CD into the “greetings” directory and type …
rails server
to start the rails built-in web server WEBrick. It shows that server is listening on port 3000.
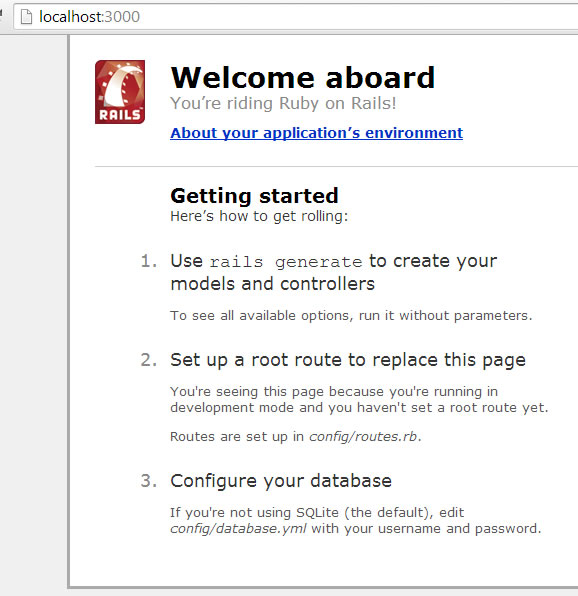
13. So point browser to http://localhost:3000 to see the default empty rails app and you should see the rails app startup screen…

rails app startup screen
14. Ctrl-C will stop the web server.


