Installing ruby on Windows
Posted in Tutorials


In this tutorial, we will install ruby on Windows 7. See my other tutorial for installing ruby and rails on Windows 8.
1. Download and run the RubyInstaller for Windows from http://rubyinstaller.org/ We are installing ruby 1.9.3.
2. When running the installer, we choose to “Install tcl/tk support”, “Add Ruby executable to PATH”, and “Associate .rb and .rbw files with Ruby”
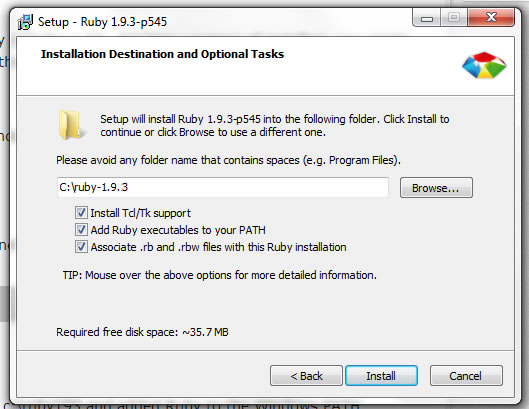
ruby installation dialog
We chose to install it in c:\ruby-1.9.3 because it says to avoid any folder names that contains space.
3. After installation, open up a command prompt to an empty directory (we choose c:\tutorials\learnruby) and type “ruby -v”. This will show what version of ruby you have and confirm that ruby has been installed correctly.
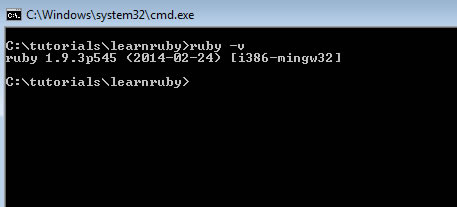
ruby version on the command prompt
4. Typing as shown will execute a line of ruby code from the command prompt …
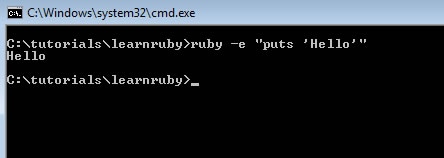
execute a line of ruby
5. Typing “ruby -h” will give you some help.
6. Typing “irb” will start interactive ruby…
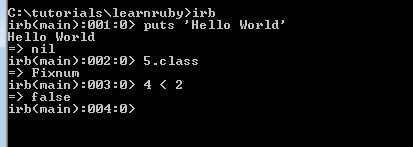
ruby irb
Type “exit” to exit out of irb.
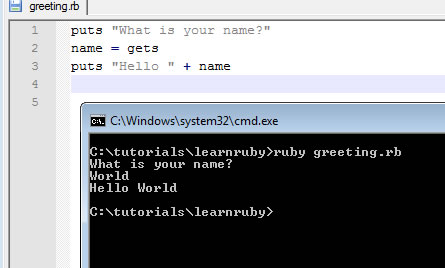
7. Type the following ruby code in a ruby file called “greeting.rb” and run it by typing “ruby greeting.rb” …
running a ruby file
This simple ruby program prints to console, ask for name, get input from command prompt, store it to variable, and print. The “gets” picks up the newline return character. To not have that, use “gets.chomp” instead and it will chomp off the newline.
8. But wait, there’s more. Installing ruby you also got “gem”. You can see what version by typing …
gem -v
We have version 1.8.28. Let’s see if there is any update. Type …
gem update –system
(note there is two dashes)
Yes, there was. Now we at gem version 2.2.2
In the next tutorial, we will use gem to install rails (Ruby on Rails that is).
Related Posts
Tags
Share This

