How to Install Google Analytics in WordPress Site
To install Google Analytics code in your WordPress site in order to track traffic and statistics, first you need to sign up for Google Analytics and get the Analytics code as describe here. The goal is to get this code right after the <body> tag of each page. If the code ends up the <head> or footer or somewhere else on the page, it should still work. And three methods of doing it. We start with the easier method and progress to the more technical method. Remember to use only one method. Having more than one Google Analytics code on your page will either break or mess up your statistics.
Method 1: Using a Plugin to Install Google Analytics
Some themes already have Google Analytics option built in so you can paste in your code or Google Analytics Tracking ID. Then you don’t even need a plugin. But otherwise, there are many plugins that can be used. One such plugin “Google Analytics for WordPress“
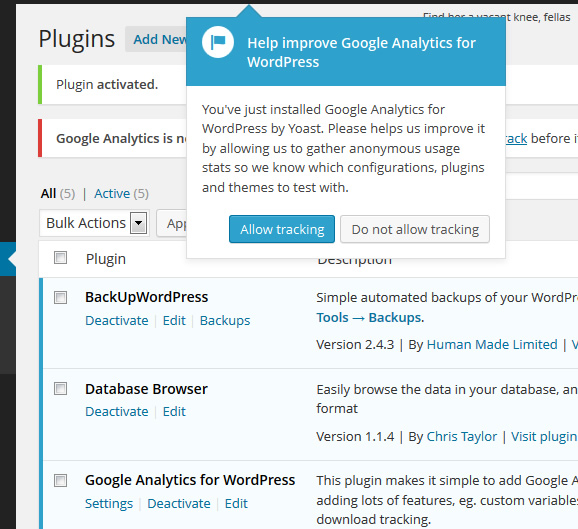
1. After installing activating the plugin (here is how to install plugins), if you get this popup …
Install Google Analytics
You can click “Allow tracking” or “Do not allow tracking” either way — this is not the Google Analytics tracking that they are referring to.
2. Click on the “Settings” link for “Google Analytics for WordPress” (shown above).
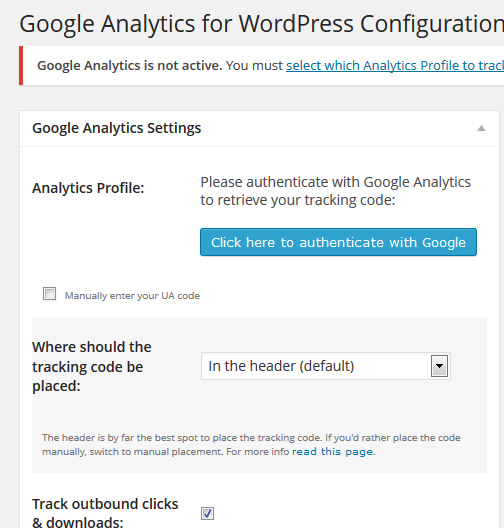
3. In the Settings page, you need to set which Analytics profile to track.
authenticate with google
4. You can click button to Authenticate with Google, in which will be redirect to a Google Sign In page.
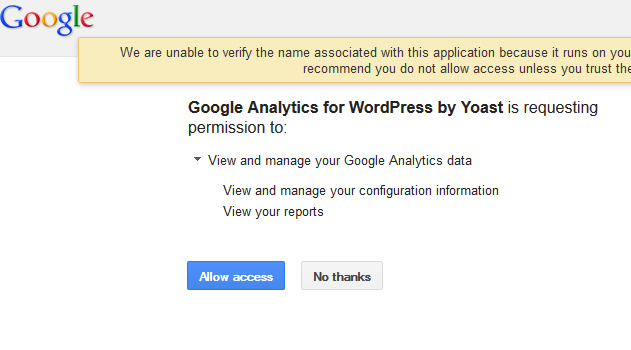
5. After signing in you get the Google permission page. It says that Yoast (the maker of the plugin) wants access to your Google Analytics data…
google analytics permission
6. Click “Allow Access” and you will be redirected back to your WordPress dashboard. Now you can select which Analytics profile you want tracked.
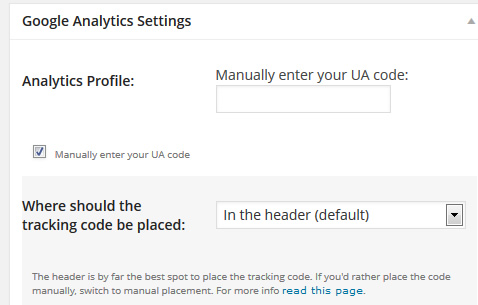
7. Sometimes the authentication fails (most likely due to this reason here) or if you don’t feel comfortable with clicking the “Allow Access” button, then you can instead checkmark “Enter your UA code manually” …
Enter analytics code
You can get the UA code (also known as Tracking ID) by going into your Google Analytics account find the website property, click the “Admin” menu, and click “Tracking Code”…
google analytics tracking code
7. The rest of the default settings for the plugin will be fine. …
Where should the tracking code be placed: In the header
Track outbound clicks and downloads: checked
Show advanced settings: unchecked
Allow tracking of anonymous data: unchecked.
8. Now click the “Update Google Analytics Settings” button.
How to confirm that Google Analytics Code is in Place
Confirm that your tracking code is in place by doing a “view source” in your browser for various pages on your site. You should see something like this in the code …
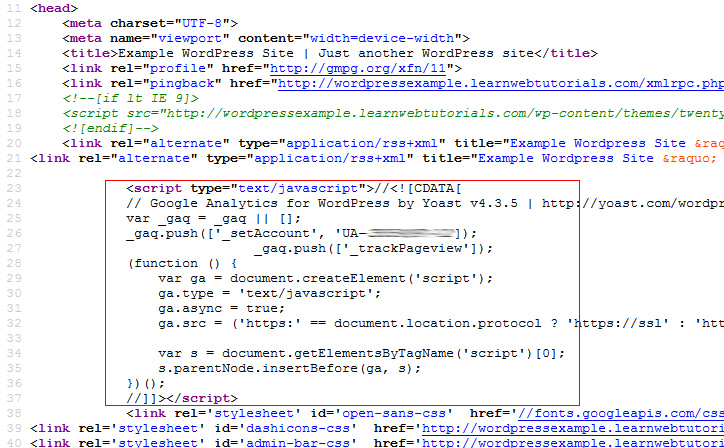
Google Analytics code in place
Check not just the home page, but other pages as well. This code should be on all pages. While this code is not right after the <body> tag, it is within the <head> tag and it is certainly fine to be there.
Method 2: Install Google Analytics By Adding to Theme Template
Instead of having the very slight performance overhead of a running plugin, you can add the Google Analytics tracking code into your theme file, typically in header.php of your theme. But you have to make sure that this header.php is included in every page. Some themes are customized in such a way that it may not be. Remember that if you switch themes, your Google Analytics tracking will no longer be in the new theme.
1. Retrieve your Google Analytics code from your Google Analytics account as mentioned above.
2. Go to “Appearance -> Editor” and select header.php.
3. Paste the code in header.php right after the <body> tag as shown …
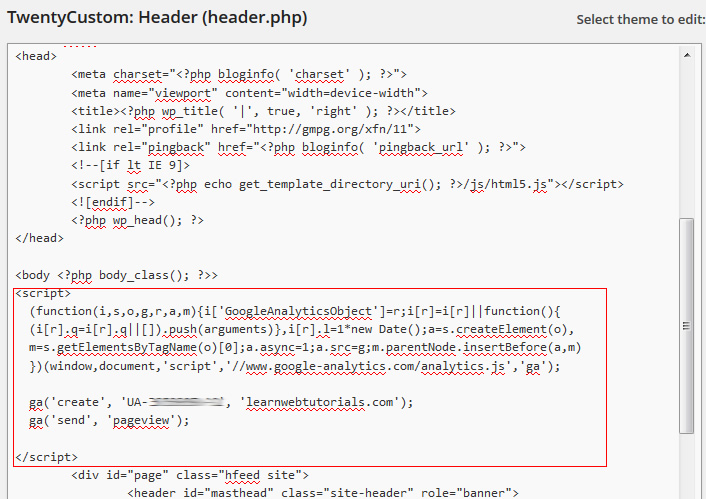
Google Analytics Code in Header
4. Save the header.php file.
Method 3: Install Google Analytics in WordPress functions.php file
PHP coding experience is need to do this method.
1. Edit the functions.php file and add the wp_head action hook …
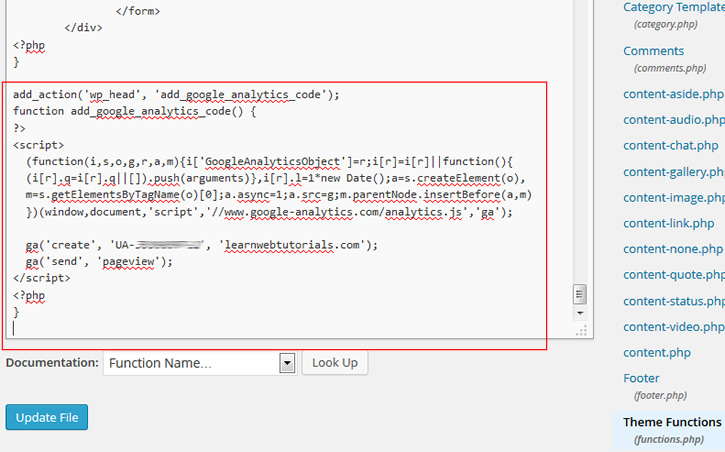
Google Analytics Code in functions
Make sure the PHP code are within PHP tags and the HTML script code is outside the PHP tags. Also note that we omit the closing PHP tags.


