Tutorial to Create Custom Post Type in WordPress
Posted in Tutorials


In this tutorial, we will create a new custom post type (or some people call them custom content type) which we will call “News”. Think of it as another type of “post” beside the standard “post” that comes with WordPress out-of-the-box. Now you can write content in the standard “post” for regular blogging. In addition, you can post content as “News”.
The ability to create custom post types is one of the features that makes WordPress more than just a blog and makes it fully deserved to be called a Content Management System.
At the current version of 3.8, you will still need to add code to functions.php theme file in order to add a custom content type. See our other tutorial on how to do that.
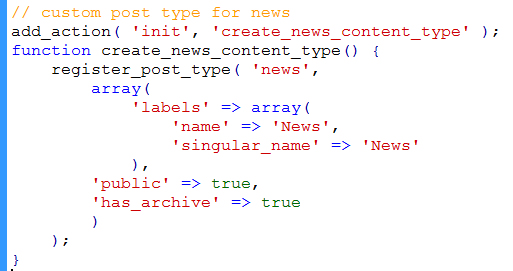
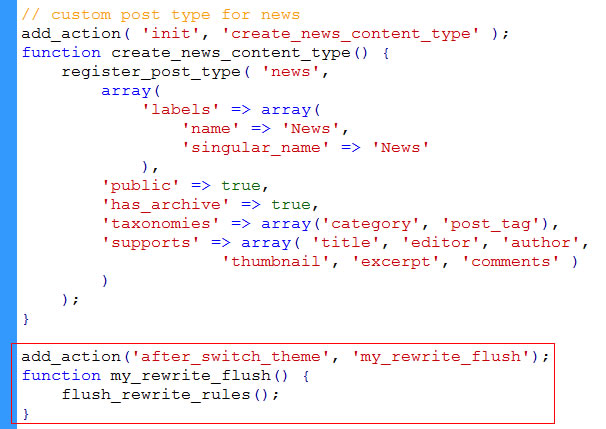
1. Registering the Custom Post Type
Add the following code to the bottom of your theme’s functions.php file …
registering custom post type
This is known registering your post type because you are calling the WordPress function register_post_type.
In our code, we have an “init” action hook which calls our arbitrarily named “create_news_content_type” function. It is in create_news_content_type() that we call register_post_type().
You can see the details of register_post_type here. Accordingly, it says that “register_post_type should only be invoked through the ‘init’ action”, which we did.
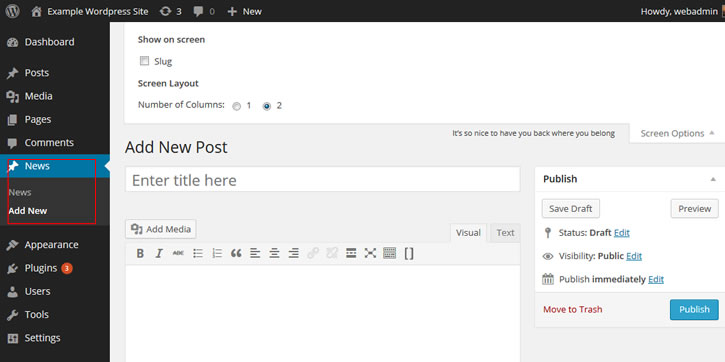
2. If you look at your WordPress dashboard now, you see the new custom post type of News and even add new post. …
add new custom post
But the post screen is very basic. It is missing a lot of options. That is because we did not include all the full arguments in the register_post_type call.
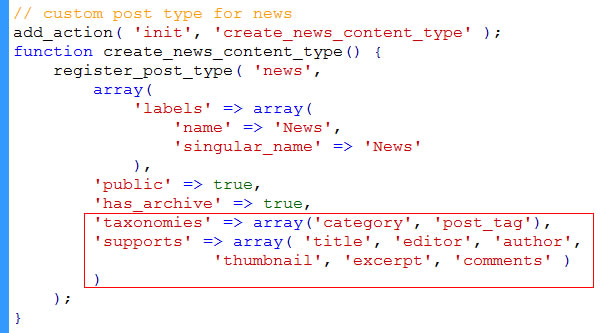
For example, right now we don’t have categories or tags for this News post type. But if we add the following …
add more options to custom post
the post screen and menu will support categories and tags (these are known as taxonomies) as well as other fields.
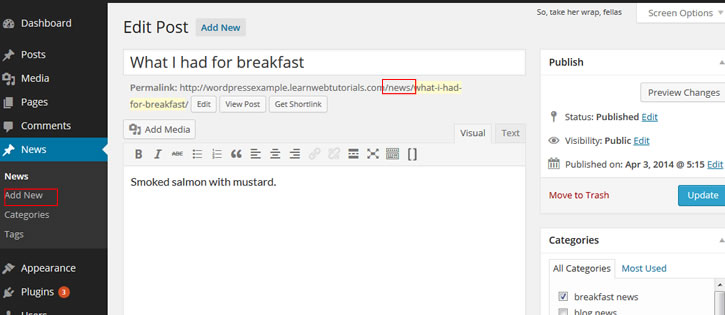
3. Adding News Posts
Try adding a News type …
adding news
Notice that WordPress creates the custom post using the slug “news” based on the name of your custom post type. You can change this slug by adding …
'rewrite' => array( 'slug' => 'events' )
in the array argument of register_post_type.
4. Page Not Found for New Custom Post Type
If you were to view your new item now, you might get “Page not found”. This is because the URL rewrite needs to be flushed and re-initaited.
You need to add the following to the bottom of your functions.php…
flush-rewrite-rules
This flush_rewrite_rules() is only invoked when a theme is switched. So now you want to switch to a new theme and switch back to your current theme.
Alternatively, when you want to flush permalinks, you can go to “Settings -> Permalinks” and save.
You should be able to view your post now.
5. Displaying the Custom Post Type
Create a few news post. Now how do we display them in a list? Just go to your post slug and the archives will be shown.
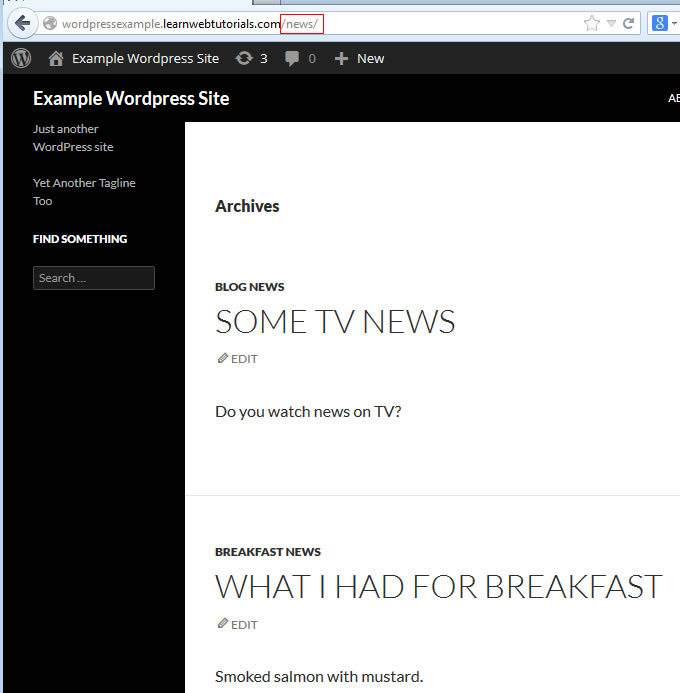
archive of custom post type
If you want a page with a listing of your news, then the answer is to create a custom page with a new custom page template and write a new loop using WP_Query. Like …
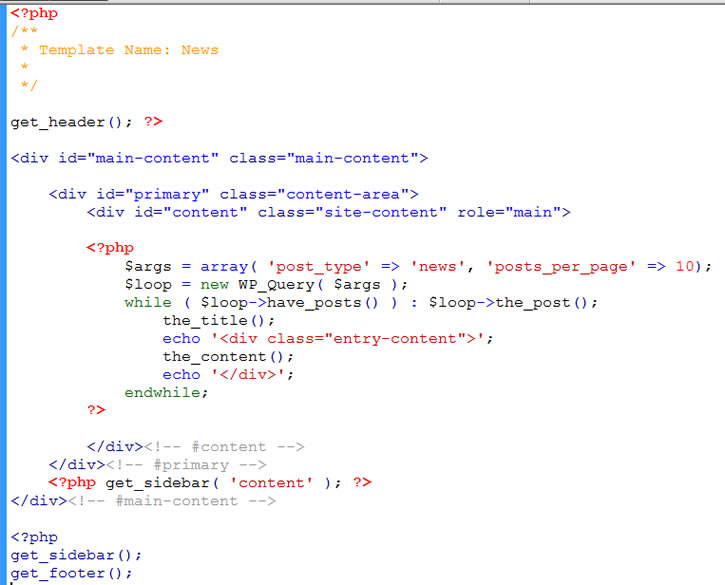
displaying custom post types
This code is placed in a new file news.php (based from index.php in the themes folder) The comment “Template Name: News” is important. That is how a custom page template of “News” is created. Learn more about custom page templates here.
Finally, create a page using the “News” template.
Related Posts
Tags
Share This

