Introduction Tutorial to Node.js
This tutorial continues right after installing Node.js tutorial. Since we are now in year 2019, this tutorial is a bit out-dated. Here is a more up-to-date tutorial.
1. After installation, create a “first.js” file in a project folder called “nodejs”. Type into first.js, the contents of …
console.log(“Testing”);
2. Search in Windows and run “node.js command prompt”.

This opens up the command line prompt. Screen shot is that of Windows 7.

3. Navigate to the “nodejs” folder with the “dir” and “cd” command. Run “node first.js” …

As expected, you get the output “Testing” from the console.log command. This is how to run a javascript file with node.js.
4. Type “exit” at the command line to exit the command line window when done.
When you change first.js, you have to run the “node first.js” command again. However, if you install the node-dev package globally, then you can type “node-dev first.js” and it will not return back to command prompt until you Ctrl-C. It works just like before. But now whenever you change the first.js file, nodejs sees the change and re-runs the script automatically for you. You will learn how to install node.js packages in the next tutorial.
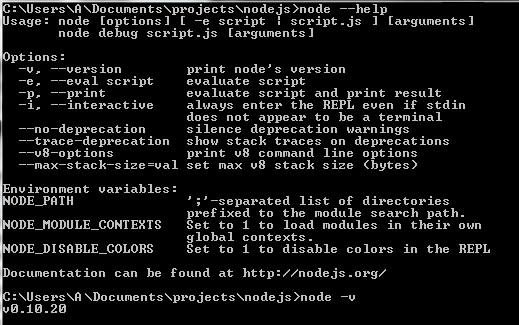
5. You can get help on command line arguments by typing the following at the command prompt…
node –help

node help and version
6. By typing …
node -v
you get the version information. Here we are using v0.19.20 of node.js
7. By typing “node” (without a filename) at the command prompt, you get interactive javascript as seen in the previous tutorial.
8. With node.js, you can run more than just plain javascript, because it can load modules using the “require” statement. For example, here we load the ‘os’ module and run the type() function from that module …

9. You can see what is in the global scope by typing “global”.
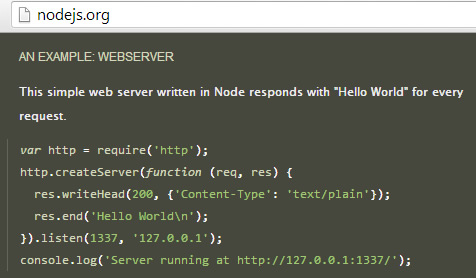
10. In the official site nodejs.org, you will see an example of an simple webserver …

webserver example
In the next tutorial, we’ll learn about the node package manager (or more popularly known as npm).


