Learning Webpack by Trial and Error
Posted in Tutorials


In this long tutorial, we will learn Webpack by trial and error.
Traditional Webapp
We start with an traditional index.html page in a folder like “webpack-tutorial”. The index.html looks like this…
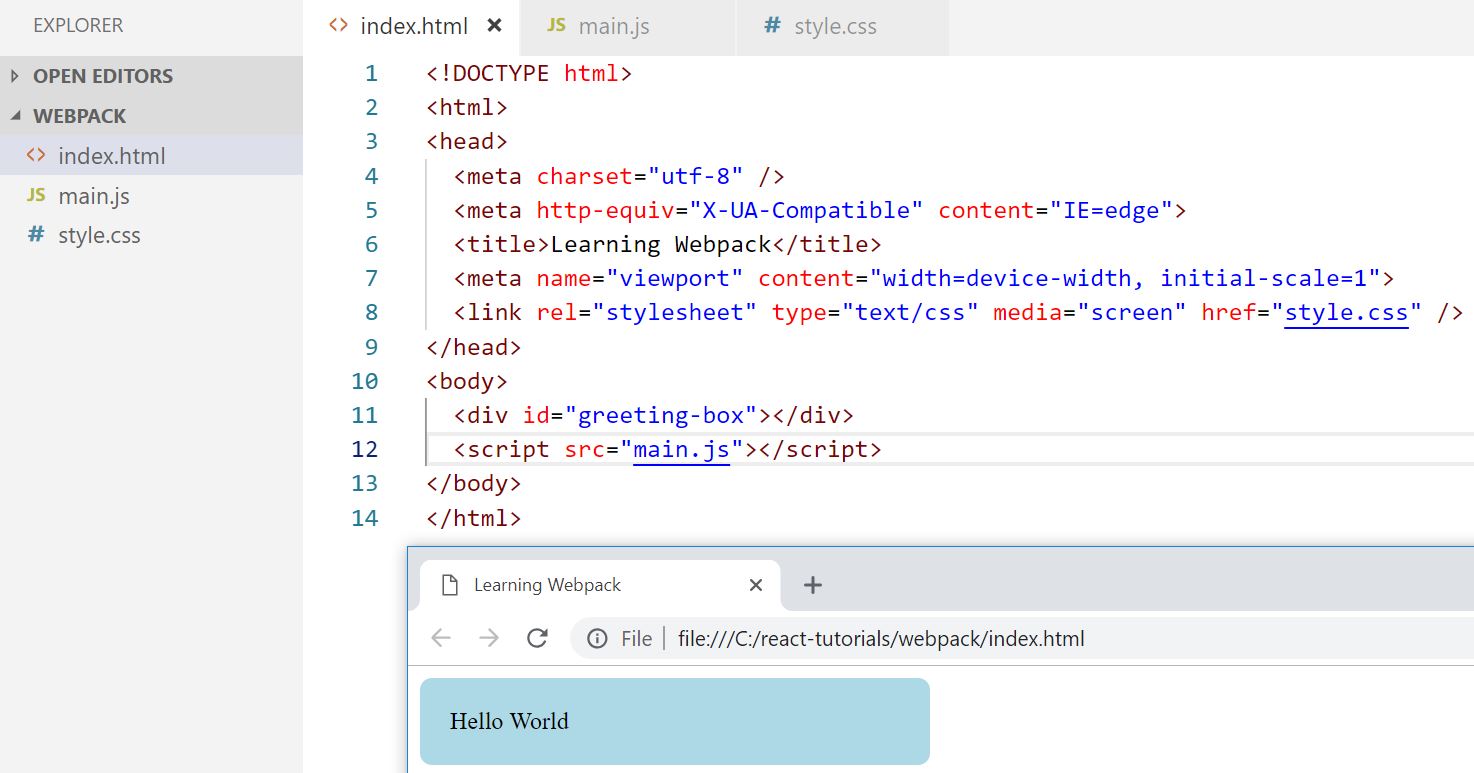
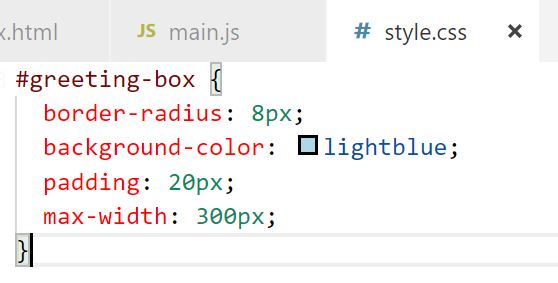
You see that it renders “Hello World” in a blue rounded-corner box. This is because there is a style.css file in same folder that contains this…
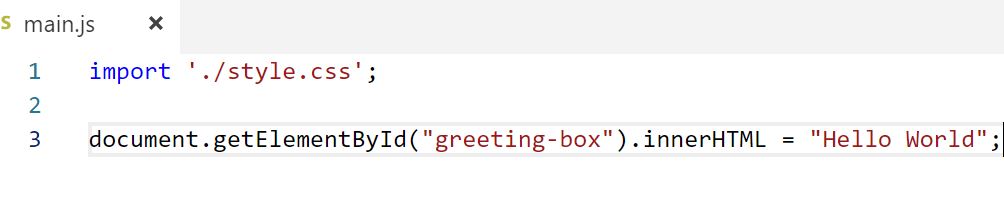
And a main.js Javascript file that writes Hello World like this …

Creating package.json
Since Webpack is typically used in a Node application that contains a package.json file, install Node and you will also get npm. Run in your terminal…
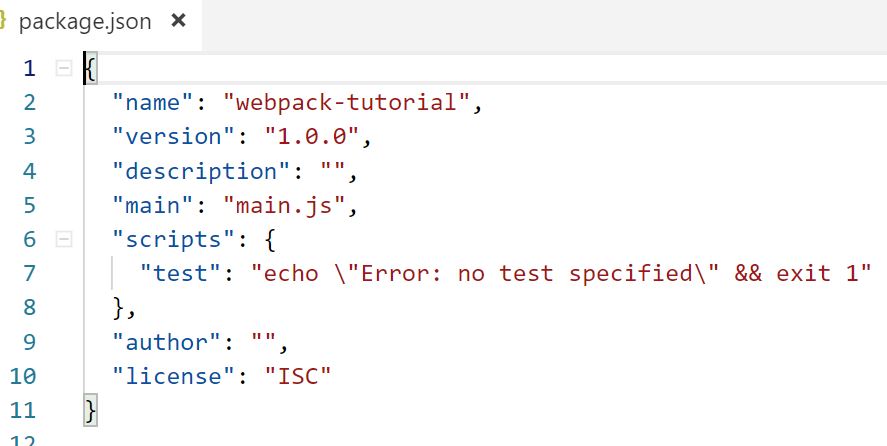
npm init
And it will generate a package.json file. Ensure that the “main” entry the package.json is your Javascript file “main.js” …
Install Webpack
Next we will install webpack locally in this Node project by typing …
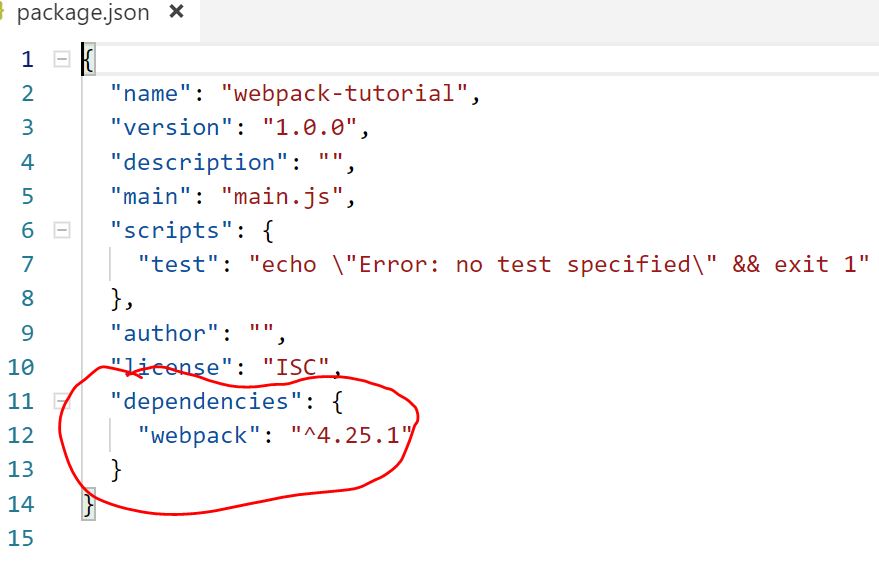
npm install webpack
Now you see it added it as a dependency to package.json.
If you try running webpack by typing “webpack” in the terminal, you find that it will not work because we have only install webpack “locally” to this Node project (which is now the current trend of doing things). We did not install it globally with the “npm install -g” flag.
No worries, we can run webpack locally to this project by typing …
npx webpack
Installing webpack-cli
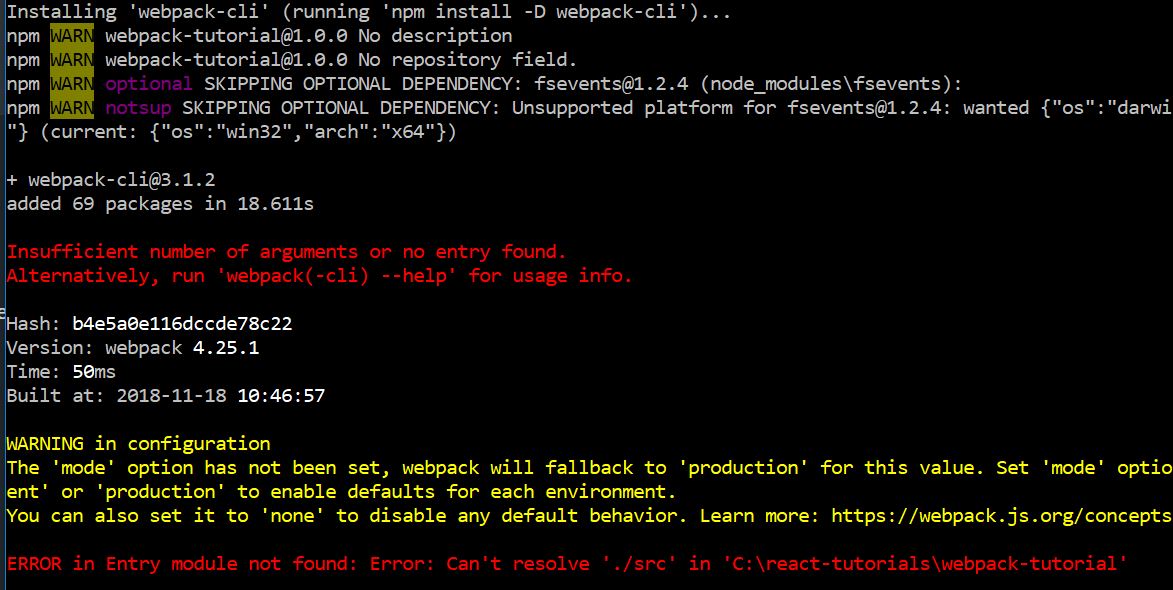
Now we get this prompt asking us to install webpack-cli …

Okay, sure. We say yes. We didn’t know that we need webpack-cli, but through trial-and-error we come to learn this. During installation of webpack-cli, you may see the following new errors…
We’ll look at them shortly.
dependency versus dev dependency
Now “webpack-cli” has actually been installed and we got another dependency in our package.json …
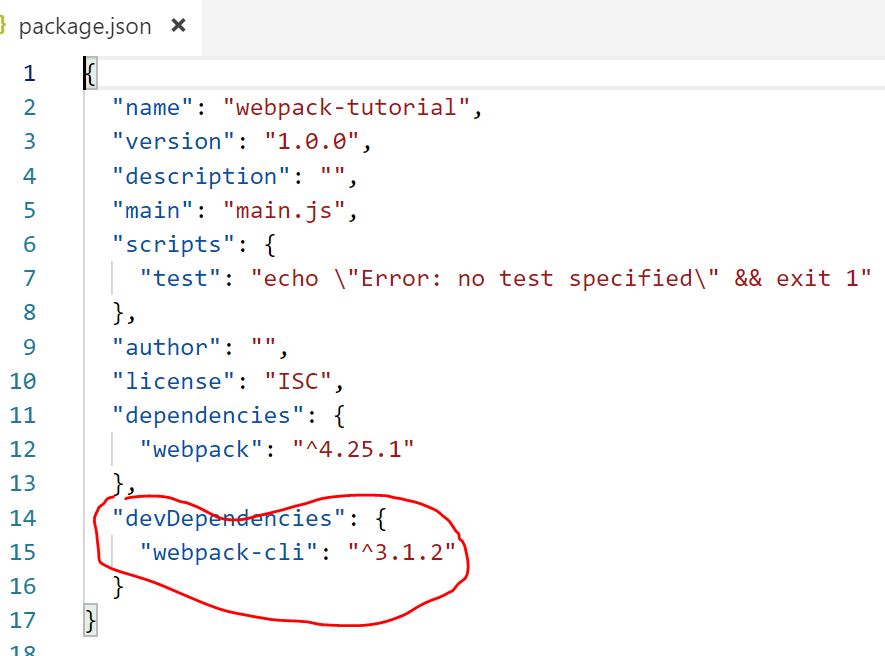
This dependency is in a new section known as a “dev dependency” because “webpack-cli” is only needed during development and not in production.
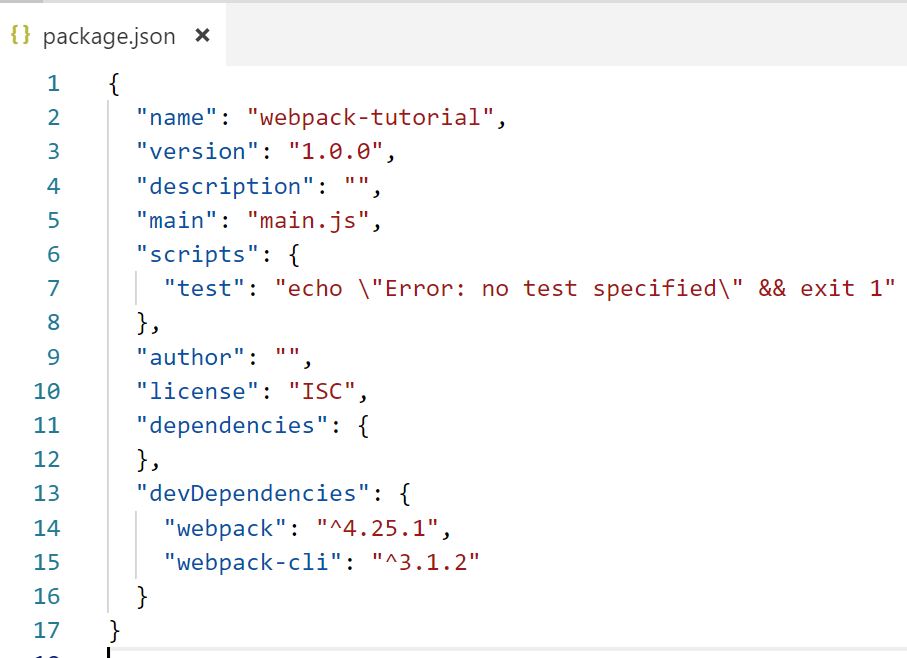
Now that we think about it. Webpack itself should also be a dev dependency instead of a dependency. We install webpack wrong. Oh well. That is why we call this tutorial “by trial and error”. We will just move “webpack” to the “devDependencies” section by making the package.json look like this …
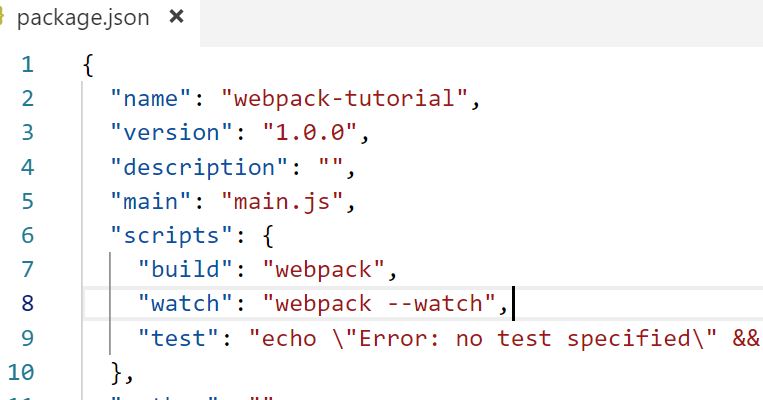
Running Webpack from npm build script
Another way to run webpack locally to project is to use an npm script. We create a npm script call “build” by making the following edits to package.json…
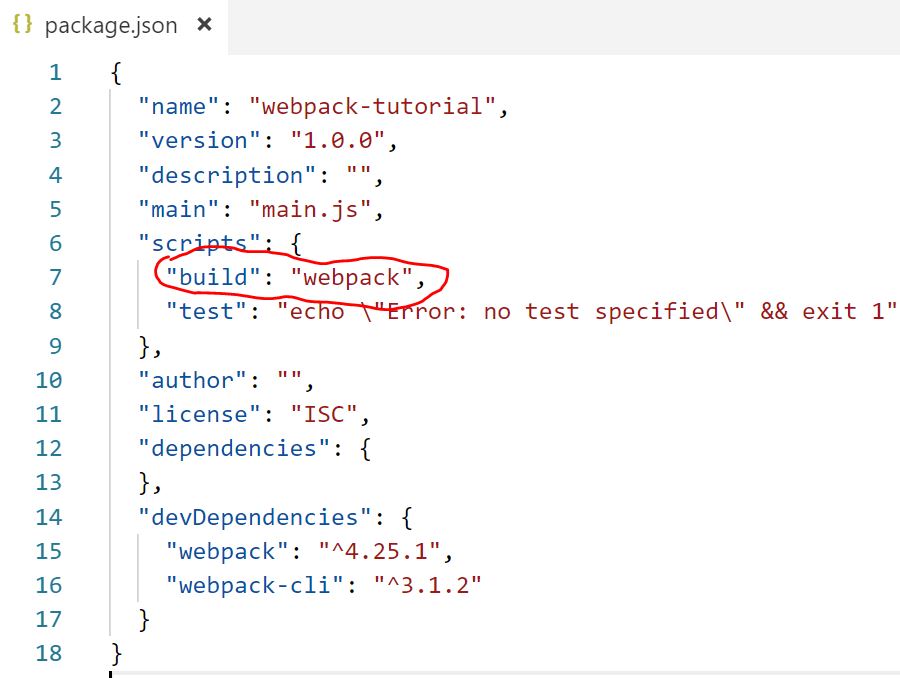
Let run our npm script by typing …
npm run build
This runs webpack and we get the same error we see before about “insufficient number of arguments or no entry found”…
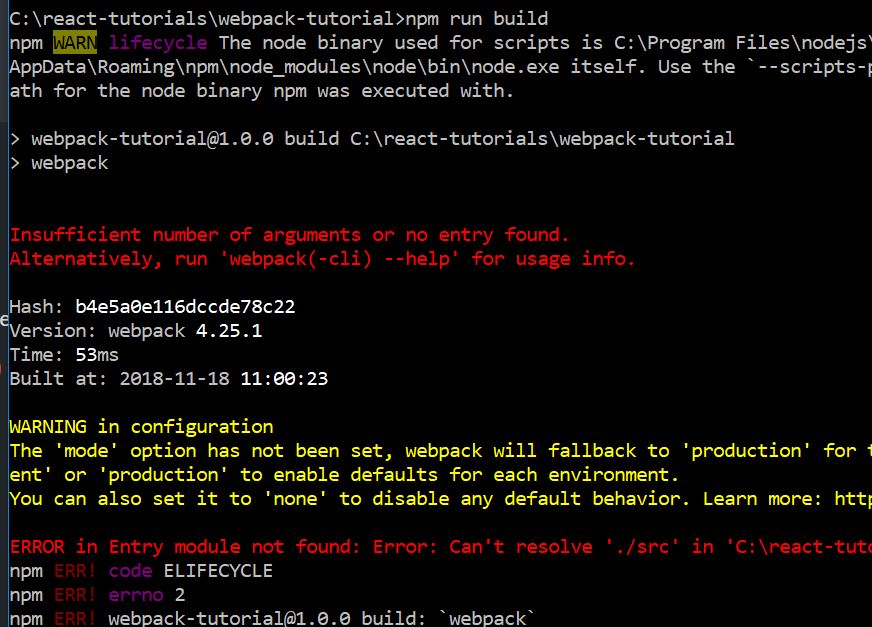
Addressing no entry found
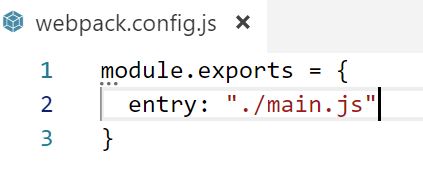
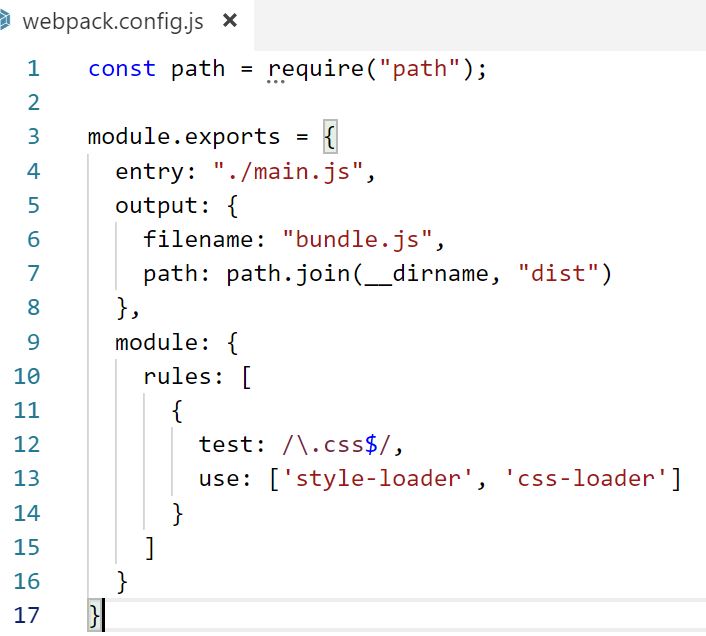
The error “no entry found” is because we need to tell Webpack which file is the starting point for it to start bundling scripts together. In our app example, this would be the main.js file. We specify this information in a webpack.config.js file in our app root.
How do we create this file? The doc is here. But to keep things simple, we just add the “entry” property in webpack.config.js for now…
Running “npm run build” again, we see no errors this time…
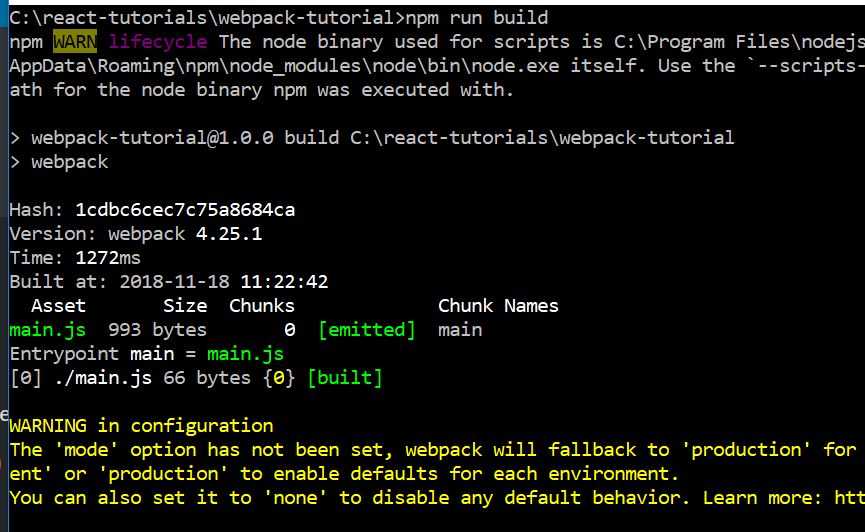
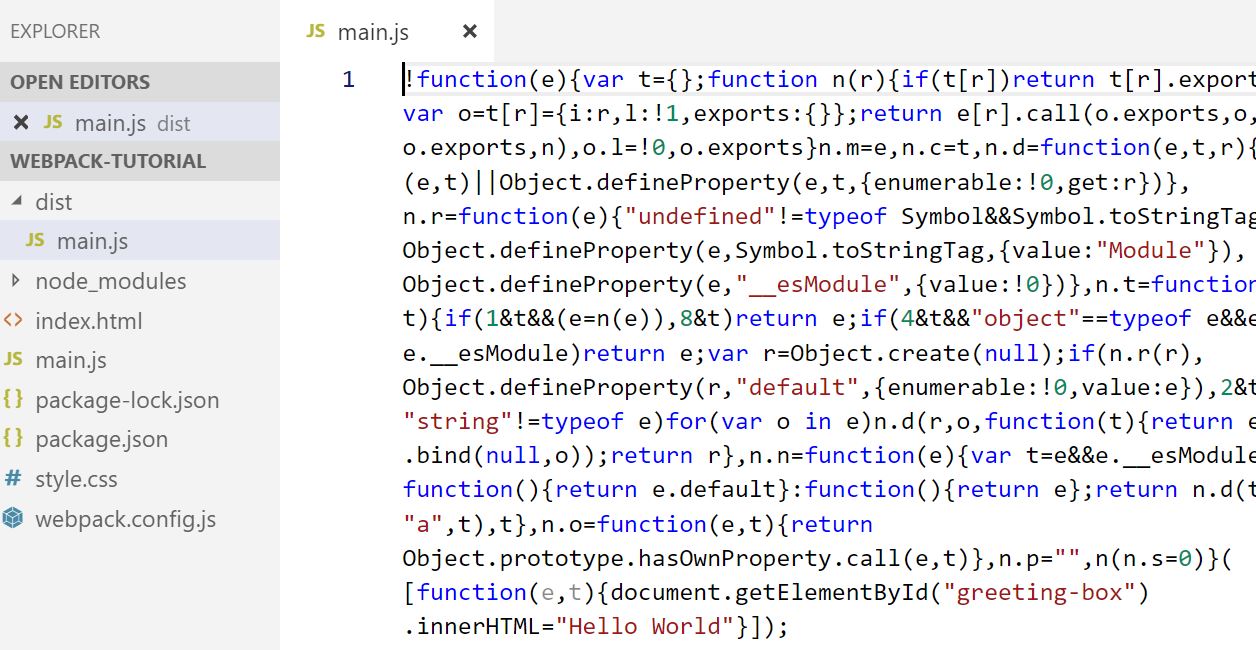
What did Webpack do?
Looking in our directory, we see a new folder called “dist” and inside we have “main.js” that looks like this (which has a bit of our Javascript embedded in near the end)…
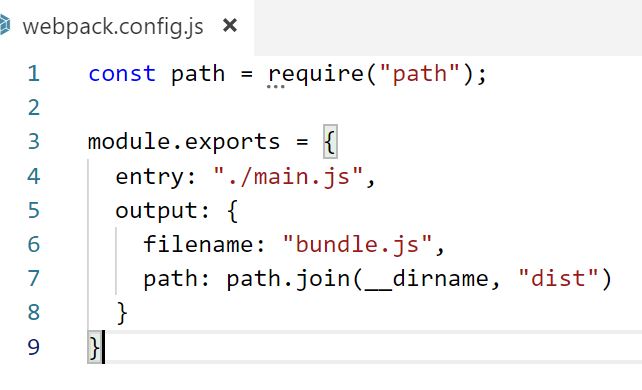
Output configuration
Typically, this output file is traditionally called “bundle.js”. The location and folder path of this output can be configured in Webpack. Because we didn’t specify the output property, Webpack defaulted to what you saw. But we will configure it to output “bundle.js” instead of “main.js” by adding the “output” property to webpack.config.js like this…
Delete out “dist” folder and re-run “npm run build” and you get the bundle.js file.
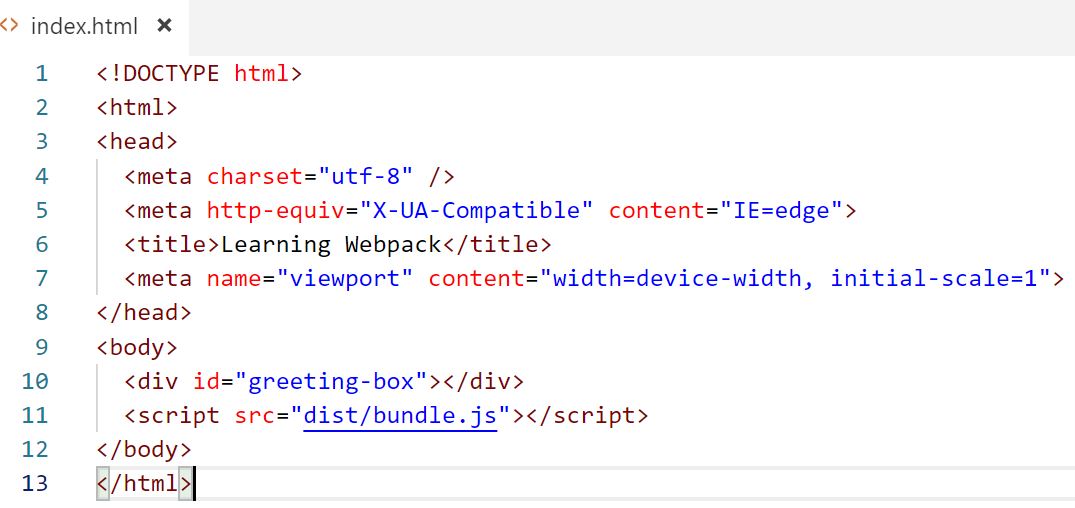
Including bundle.js in our HTML
We can tell our index.html to use this bundle.js instead of our main.js by changing the script src …
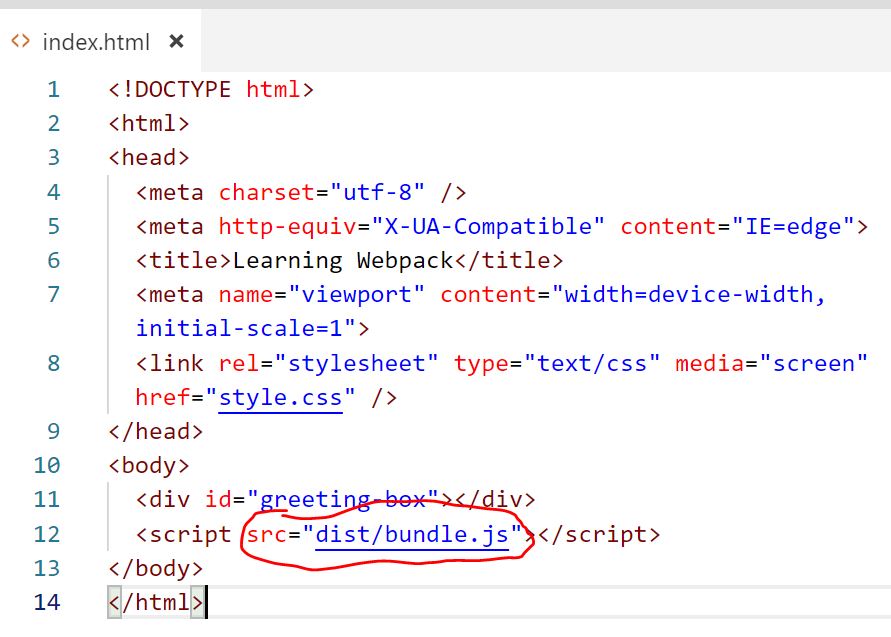
and it will run the same as before.
Adding CSS to bundle.js
In our index.html, we see above that we reference style.css. Can we add the style.css into our bundle.js? Let’s try import the style.css file into our main.js file…
Normally, you would not be able to do this. But with Webpack, you can. However, when we run “npm run build”, we get this error saying that it does not know how to handle css files…
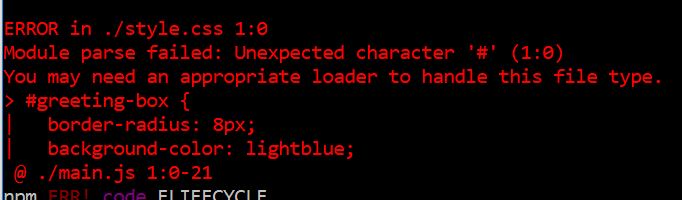
It also suggests that we might need an “appropriate loader to handle this file type”.
Adding css and style loader
Okay, so we add css-loader and style-loader to our webpack.config.js …
This tells Webpack that if it encounters and file that ends in .css, then run it through the “css-loader” first (which reads the CSS and converts it to Javascript so that it can add to bundle.js), and then run it through the “style-loader” (which dynamically adds the “style” tag to your HTML file and inserts the css). Note the order of the loader specified is important.
Doing “npm run build”, we get error saying …

This means that we have to install those loaders as dev-dependencies …
npm install –save-dev style-loader css-loader
Now “npm run build” runs successfully and we can delete the style tag from our index.html…
And it still works with CSS intact.
Webpack url-loader
Another important loader is the url-loader which will convert files such as images into base 64 URIs. Remember to install it with “npm install –save-dev url-loader”. A typical rule for it would be …
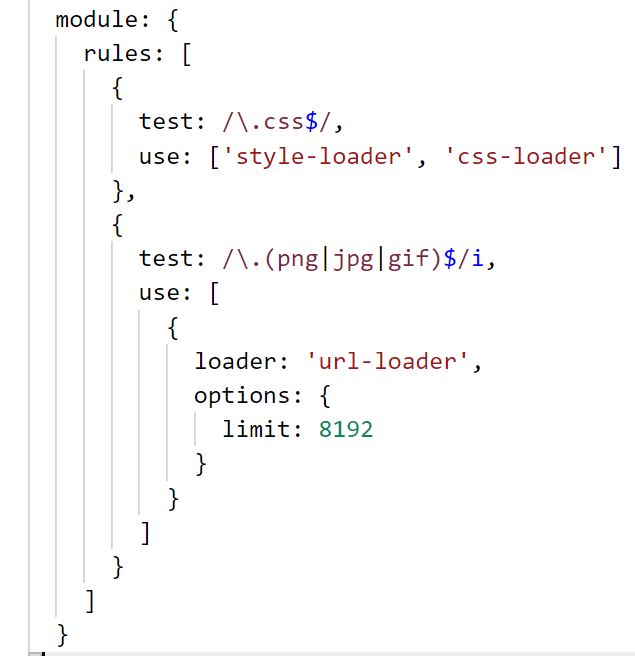
Note the new syntax for specifying this loader can have an option of “limit”. This means that if image is less than 8192 bytes in size, the url-loader will run and embed the image directly into the bundle.js file.
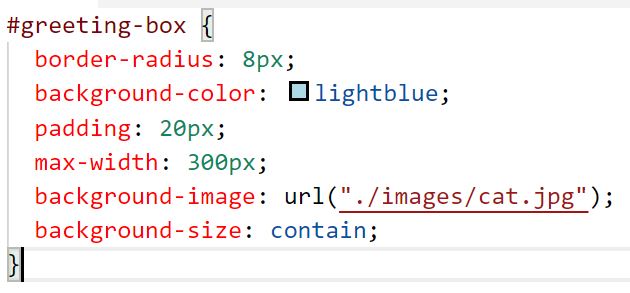
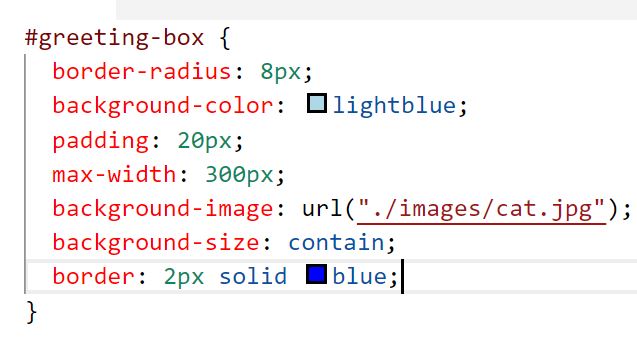
In style.css, I’ve added an image “kitten.jpg” (which is less than 8192 bytes) …
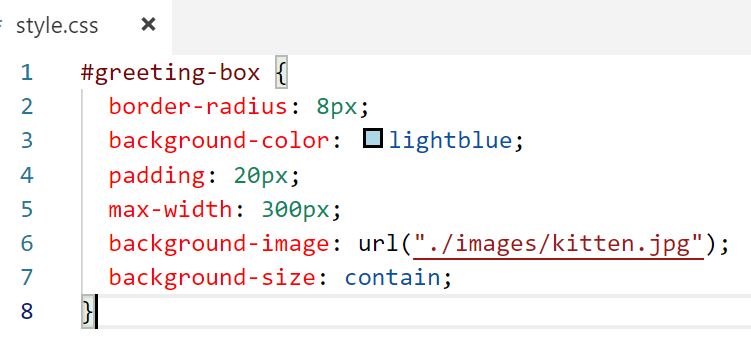
And you will see that it works as expected (even if I don’t put the kitten.jpg up in the production server because image is in the bundle.js)…

Open up the bundle.js and you will see the base64 encode of the image in there.
But if I change the image to a “cat.jpg” which is over 8192 bytes ….
I get this error…
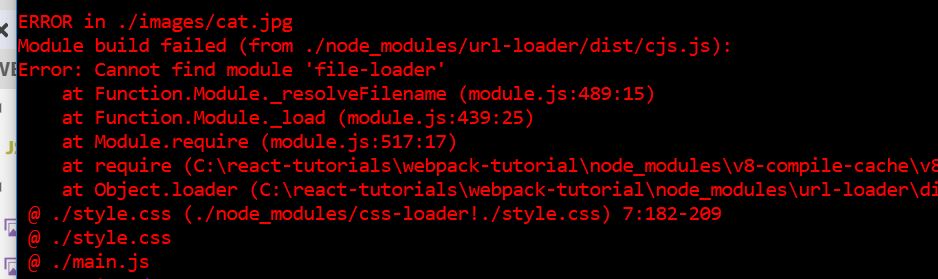
This is because when image size exceed limit size specified for url-loader, then url-loader will not run and pass the file to “file-loader” to run instead. file-loader will emit the image file to “dist” folder instead of embedding the image as base64 into the bundle.js.
Therefore, we need to “npm install –save-dev file-loader”. Now when we run “npm run build”, we don’t get any errors.
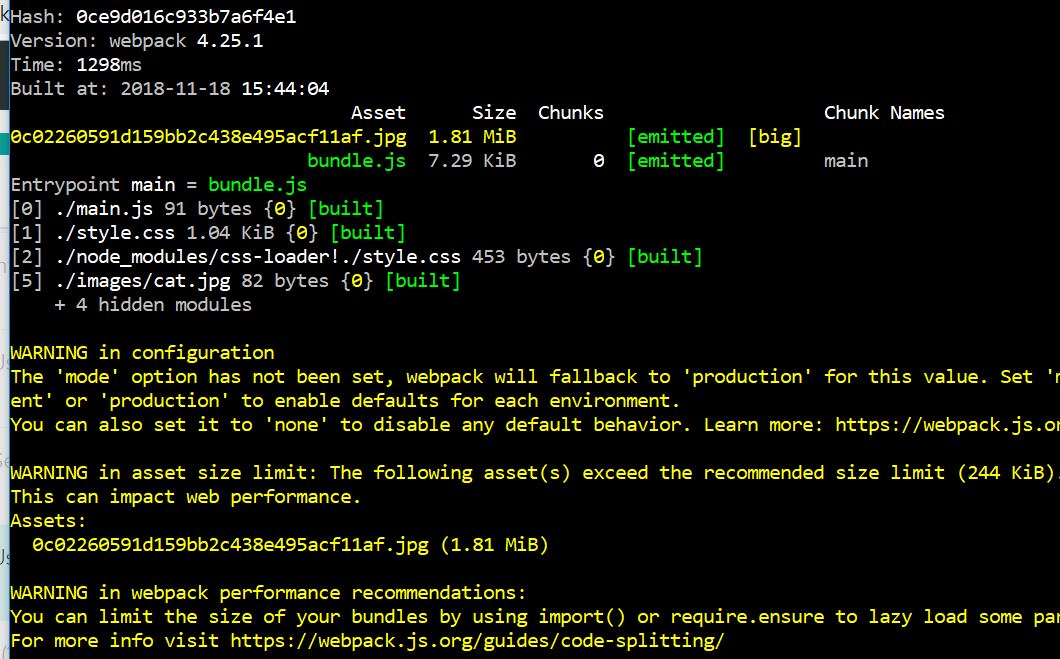
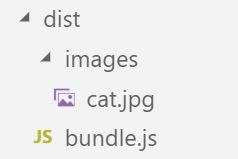
But a new 0c02260591d159bb2c438e495acf11af.jpg asset is output to “dist” besides our bundle.js.
This is a bit of a problem, because our style.css is still referencing cat.jpg. I don’t want webpack rename my image file. Therefore, we add the “name” option …
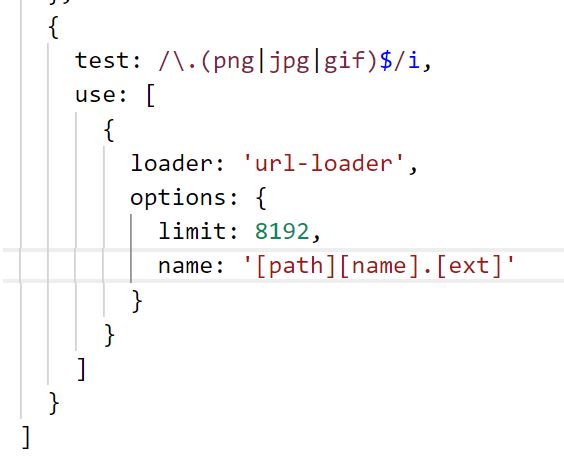
Delete our dist folder and “npm run build”. This time we get output as expected …
Webpack Watch
By now you are probably tired of typing “npm run build” all the time. Webpack has a watch flag which we will involve in an new npm script called “watch” …
Now when we run “npm run watch”, Webpack runs like normal and then watches for files changes and will re-run as needed. That is why it does not terminate in the terminal. To actually stop it, do Ctrl-C.
While Webpack is in watch mode, add blue border to style.css and save …
And refresh browser of our index.html and see blue border in effect (without us needing to re-run webpack)…

That’s is for this intro tutorial on Webpack.
Related Posts
Tags
Share This

