How to Make a JQuery Carousel
Posted in Tutorials


In this tutorial, we will make a JQuery carousel (also known as image slideshow) with prev and next button that loops back on itself. Sure there are many JQuery carousel plugins out there which you can use. But it is instructive to see how to make one from scratch. This provides you with the fundamental concepts so that you can modify the carousel to your specific needs to customize one of the off-the-shelve carousels. This will be an advanced tutorial, so it assume prior CSS and jQuery knowledge.
The below is a screen shot. For a live demo, click here.

carousel with prev next
1. We start off by setting up our index.html file and putting our three images into an unordered list structure like this …
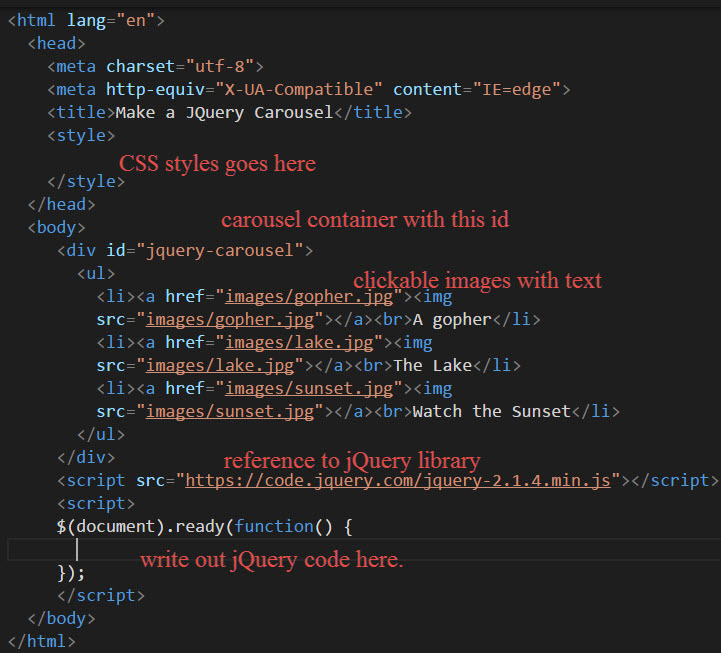
setting up carousel
Note that for keeping the tutorial simpler, we are putting the CSS and JS on the same index.html page. But in real world applications, you would separate it out into its own file.
Our initial output is looks like this …

initial output
2. By adding these styles …
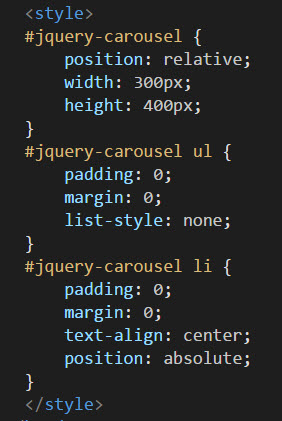
stack the images
we get the images to stack one on top of another …

stacked images
The width of the images are 300px by 230px. But we set the jquery-carousel div to be 300px by 400px to give room for the bottom text (which we center in the CSS with text-align: center).
The images stack because of position absolute on the “li” relative to the “jquery-carousel” div which is “position: relative”.
3. The text also is one on top of another. We remedy this by adding class “active” to the current li image…
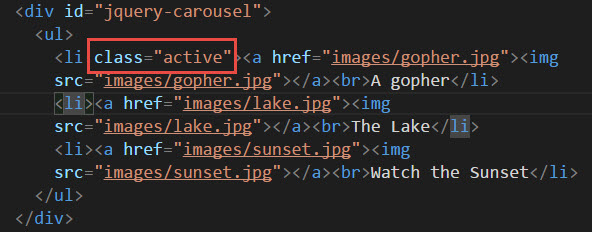
the active li
And give it the style “display:inline” while the rest of the li’s are “display:none” …
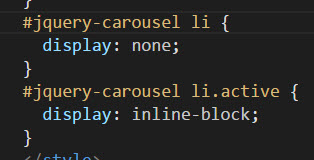
active style
Note that it is best to put the order of these two CSS rules as shown above.
4. Now let’s add a “<” and “>” buttons to let the user go previous and next…
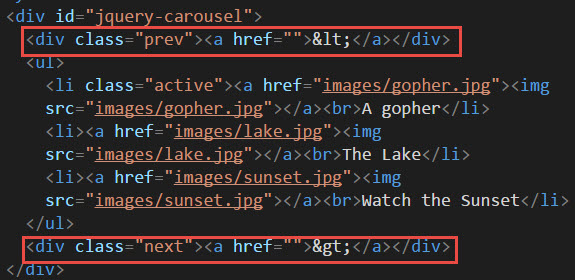
add prev and next buttons
with the following styles …
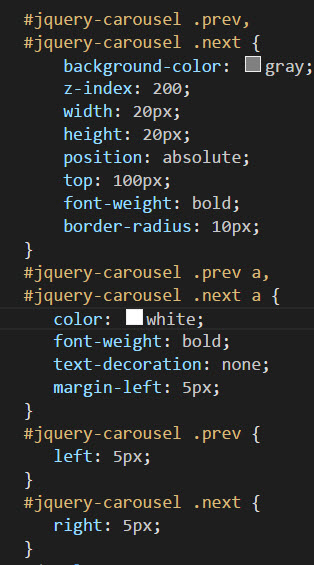
navigation styles
And we get …
carousel with prev next
5. Now add jQuery to make the “prev” and “next” button work…
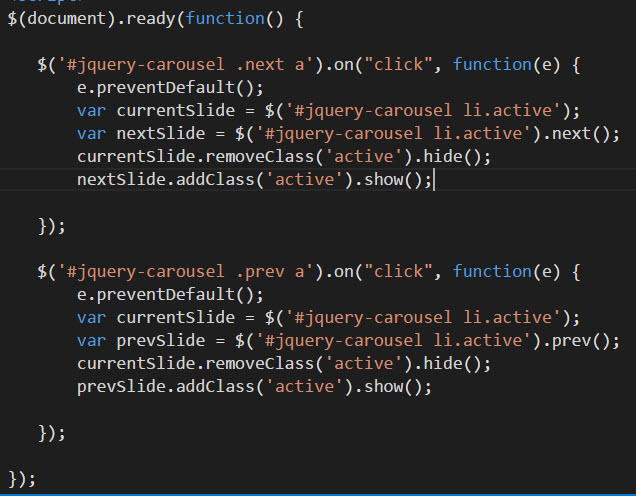
add prev next handlers
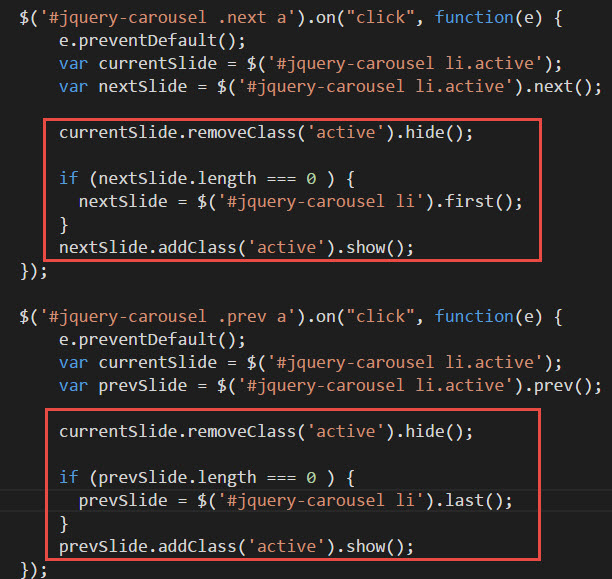
We hide the current slide by removing the class active and hiding it. We show the next/prev slide by attaching the ‘active’ class to it.
6. The problem is when we get past the last slide when nextSlide.length becomes 0. When we detect this condition during the “next” button, we set the first slide to be active….
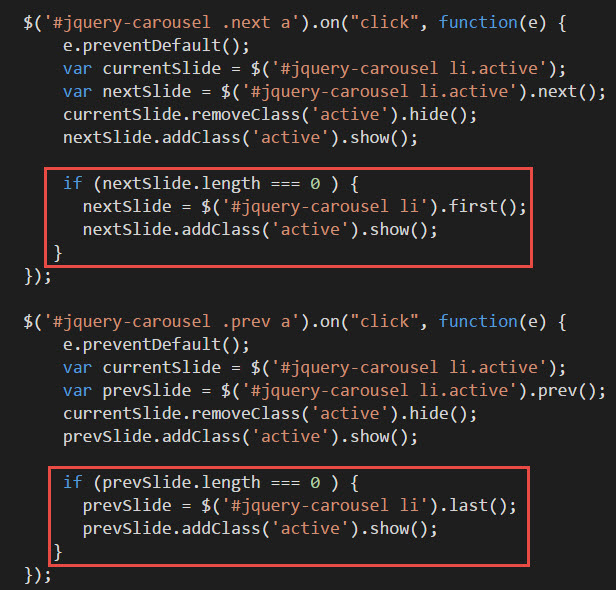
handle last and first slides
We handle similarly for the prev button (shown above).
7. Finally, we do a bit of code refactoring.
refactoring
Another optimization is to remove the “show()” and “hide()” because by adding and removing the CSS class “active” is enough to display and hide.
It should run the same. To see the final code, click to the demo and do a “view source” in your browser.
Related Posts
Tags
Share This

